Aurora Systems Manager #
The Aurora Systems Manager is a powerful utility providing means to administer the Aurora SQL Server database, including options to update the schema, perform housekeeping, manipulate Text Retrieval, and control operator logins in the context of an Active Directory environment.
Aurora Systems Manager is not a general install, and will be restricted to system managers. The application is invoked from its executable, providing a desktop shortcut. For operators with level 9 security setting, the Systems Manager may be invoked from the Backroom ribbon bar.
Preparation #
The initial screen opens to the Preparation tab, which addresses database schema update. Note that this program is continually developing, and your version may not look entirely like this image:
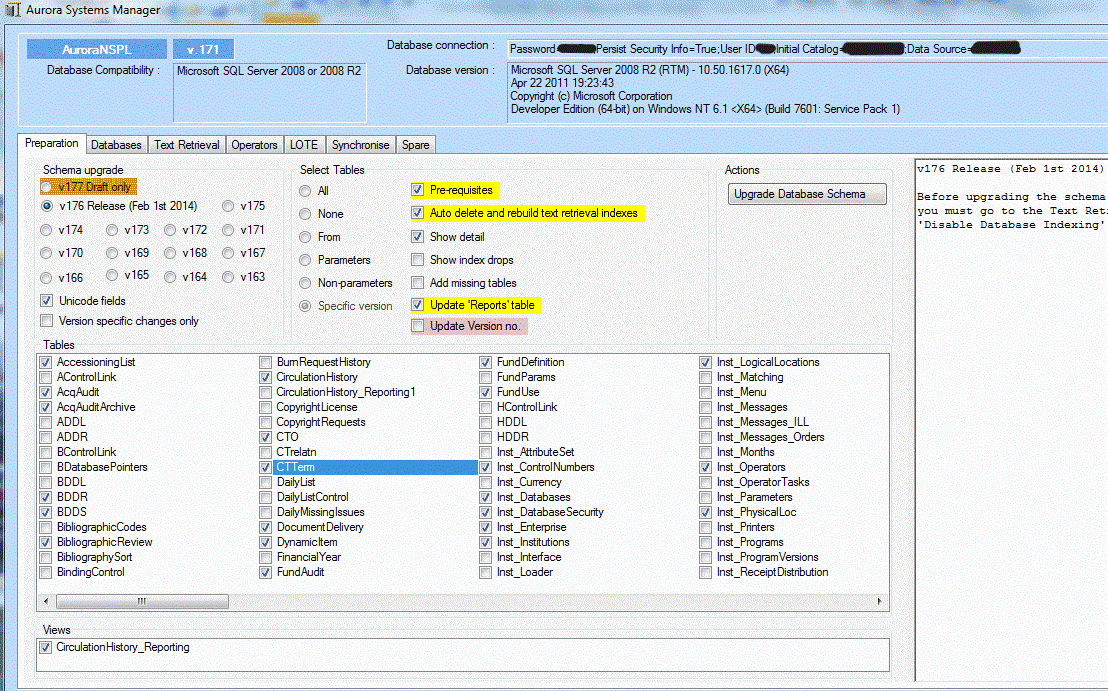
This screen is divided into separate panels as detailed on this page.
Version advice #
The panel to the right will reinforce the selected version to be used for the update process.
Note that for v 176, additional advice is offered:
Before upgrading the schema of tables BDDS, CTTerm or UserReport you must go to the Text Retrieval tab and run the 2 Steps to 'Disable Database Indexing' AND 'Delete Text Retrieval Catalogs'
ASM v176 UPGRADE
Until this is run some of the new functionality will not be available.
For example – Annual Statistics will not run until the schema is upgraded as the SQL used by this process requires the new CirculationHistory fields. After a schema upgrade these fields will be populated from the schema and AWS installation onwards. To retro update these empty fields you need to run the following SQL statements after the v176 schema upgrade has been completed.
update CirculationHistory set CC_ihome = (select ID_Home from DynamicItem where CC_AUitemID = ID_AUitem) where CC_ihome = 0
update CirculationHistory set CC_ihome = (select top 1 LL_ID from Inst_logicallocations with (nolock) where LL_Ploc = cc_fromploc) where CC_AUitemID > and (CC_IHome is null or CC_IHome = 0)
update CirculationHistory set CC_uhome = (select u_home from UserReport where CC_AUuserID = U_ID) where CC_uhome = 0
–Cleanup statements
update CirculationHistory set CC_scat2 = 0 where cc_scat2 is null
update CirculationHistory set CC_uhome = 0 where CC_uhome is null
update CirculationHistory set CC_ihome = 0 where CC_ihome is null
IMPORTANT NOTES
Steps
1. Before running ASM ensure the database has just been backed up.
2. Truncate the database log. If it is already large or fragmented the processes below may cause this log to be full and the upgrade process will stop.
3. Check the “Database Compatibility” section shown at the top of the ASM screen. Look also at the Databases tab and see the “Current compatibility” setting and the “Specify Compatibility” options.
It is possible you have a newer relational database e.g. SQL Server 2008 R2 but that the database has carried through with upgrades over the years with the original compatibility standard e.g. SQL Server 2000. The database should be brought up to date and ASM can do this.
Your database should be compatible with the SQL Server version you are running (for performance and other reasons) so you should bring the compatibility level up to the latest version. You can do this via the “Specify Compatibility” radio button selection on the Databases tab.
Please note that the application will attempt to run the following SQL on the relevant Aurora database (shown here as AuroraXXXX) and to the relevant SQL Server compatibility setting (as per your selection).
Please note that the 3 lines run are as recommended by Microsoft however as we are running these via an application and not via SQL Server Management Studio there is a possibility that the process will time out. If this happens there is a possibility also that the database will be locked in Single user mode and in that case this setting will need to be removed in order for users to access the system.
Therefore it’s highly recommended that if you are to upgrade the compatibility then the person performing the task should be able to run SQL Server Management Studio if the need arises to run the last step to return the database to multi-user mode.
Alternatively someone in IT can simply run the 3 steps below one at a time using SQL Server Management Studio.
ALTER DATABASE AuroraXXXX SET SINGLE_USER
ALTER DATABASE AuroraXXXX SET COMPATIBILITY_LEVEL = 100
ALTER DATABASE AuroraXXXX SET MULTI_USER
The Compatibility levels are
— SQL Server 2012 = 110
— SQL Server 2008 = 100
Please note that SQL Server Management Studio should be available but closed when running the task to change database compatibility.
If you are upgrading an SQL Server 2008 or 2012 database then the application will take advantage of the new SQL text retrieval commands which allow for the removal of a StopList. This in turn improves searches as noise words are no longer removed from searches and will form part of the search. By default the “System StopList” checkbox on the Text Retrieval tab will be un-ticked and so will be removed. If you run this with the default setting – which is recommended – you must also go to the Aurora Desktop “System | Enterprise” screen after the run and set the IgnoreNoiseWords setting to ON. If you don’t do this the noise words will still be removed from searches by Aurora Desktop and this will negate the improvements of not applying a StopList.
When you upgrade a SQL Server 2008 or 2012 database the new checkbox “Auto delete and rebuild text retrieval indexes” will be ticked and if ticked you no longer need to delete the text retrieval indexes then rebuild them step by step afterwards – it will all be done automatically !
If you are unsure of any of the above please contact AIT. If required AIT can – for a charge – perform the schema and text retrieval upgrade for you out of hours (using TeamViewer 8) following a backup of the database done locally.
AWS 4.2.26 Until this is installed some new things cannot be used via Aurora Desktop as the AWS backend needs to be in place e.g. Bibliography creation (new on the Reports screen)
Connection #
The Connection panel shows the Connection string used to connect to the database. This will be created when the system udl file is defined. In case of problems, AIT may request this information. This panel also reports the database schema version, and the SQL Server database version:

Database #
The Connection panel also reinforces the current database and schema version. Note that bigger installations may have test databases as well as live, and this is the visual reinforcement.
Database compatibility #
The database compatibility panel will indicate the level of SQLServer interpreted for the current database:

This may be changed using the Specify compatibility options noted below.
Upgrade process #
The process for upgrading a schema is one of following prescribed steps, and this will be illustrated below. This document does not provide a full set of advice on the overall process, but is concerned with explaining the details presented. For a worked document explaining the procedure, and detailing the necessary prerequisites in the operation, please see the separate ‘How To’ document.
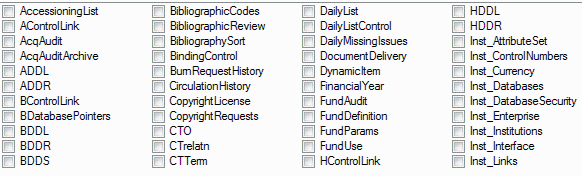
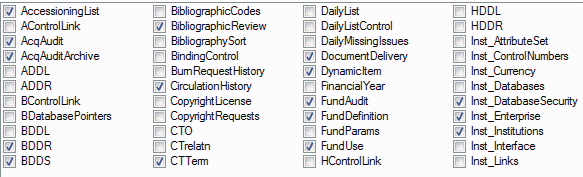
Once connected and the Systems MNAGER will populate the lower panel (empty up to this point) with each table in the Aurora database, in alphabetical order. Each table has a checkbox, which will be unticked at this point.
 #
#
Schema Upgrade #
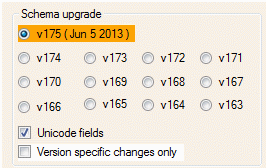
The next step is to select the parameters for the upgrade. The Schema Upgrade panel will list the available schemas, and a specific schema version may therefore be selected by radio button. By default the latest version is selected.
Note that there are two checkboxes in addition:
- Unicode fields. This will ensure that all necessary fields are upgraded to hold Unicode compliant data, allowing for import and display of non-Roman characters, e.g. Chinese, Korean, etc. This is selected by default, and AIT recommends this action.
- Version specific changes only. This checkbox if selected will only apply table updates specific to the version number selected. If unticked, then multiple version updates may be concatenated in one pass. AIT will advise if a specific version only is to be applied.
When the upgrade version is selected, then each table requiring a modification is selected. Note that an overall index change may require all tables to be updated.
Select tables #
The Select Tables panel provides a number of options as detailed below. By default, the radio button: Specific version, and the checkboxes: Pre-requisites, Show detail, and Update Version no. are all selected, and this is normally all you need to set:
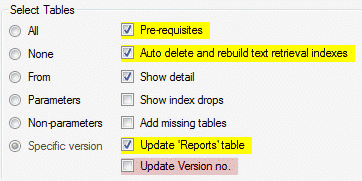
A set of radio buttons is provided to select:
- All
- None
- From
- Parameters
- Non-parameters
- Specific version [default]
AIT will advise if any setting other than the default is required
The following checkboxes are provided:
| Pre-requisites | Set as default | This is necessary as pre-process checks need to be made before the update is performed |
| Auto delete and rebuild text retrieval indexes | Set as default | AIT advises that text retrieval indexes need to be deleted prior to Schema update, and rebuilt on completion. This setting allows that process to happen automatically. |
| Show detail | Set as default | This allows the log to be written to screen interactively, so you can observe the progress of the upgrade |
| Show index drops | This is not normally required to be explicitly visible – where index updates are applied and existing indexes are dropped. | |
| Add missing tables | AIT will advise on this setting, which may require a missing table to be added. This may be used if a table is explicitly deleted, to allow recreation | |
| Update ‘Reports’ table | Set as default for v 176 | AIT is upgrading SQL syntax entries in the Inst_Reports parameter table, for presentation as ‘canned’ reports. Setting this option ensures that the necessary updates are correctly applied. |
| Update version no. | Set as default | The version number shown in Database is taken from the database table Versions. The upgrade process writes the updated version detail to this table as an audit trail. |
Upgrade schema #
Once you are satisfied that the prerequisites are all in place, and your choices so far are all good, then the upgrade can be initiated using the Upgrade Schema button.
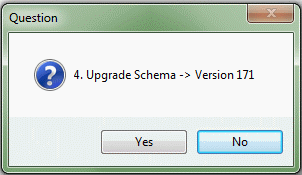
You will immediately be asked to confirm that the upgrade is to be performed, and this question will again reinforce the selection schema version number:
As the upgrade progresses, the details of the table being addressed are written to the log screen on the right. Note that the log is also written to [AuroraWork] as SchemaManagerUpgrade_<versionnumber>_<datestamp>.txt
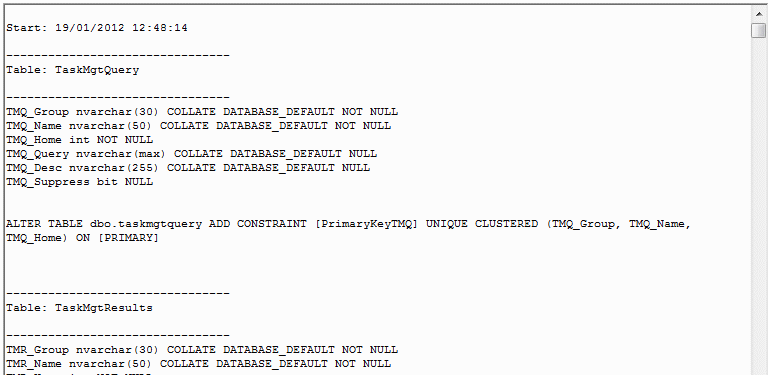
The log should always be checked carefully for any reported errors – if errors are found, you should send the log to AIT
Completion #
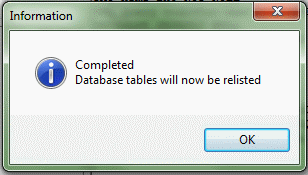
On completion, Aurora will provide the following message:
Databases #
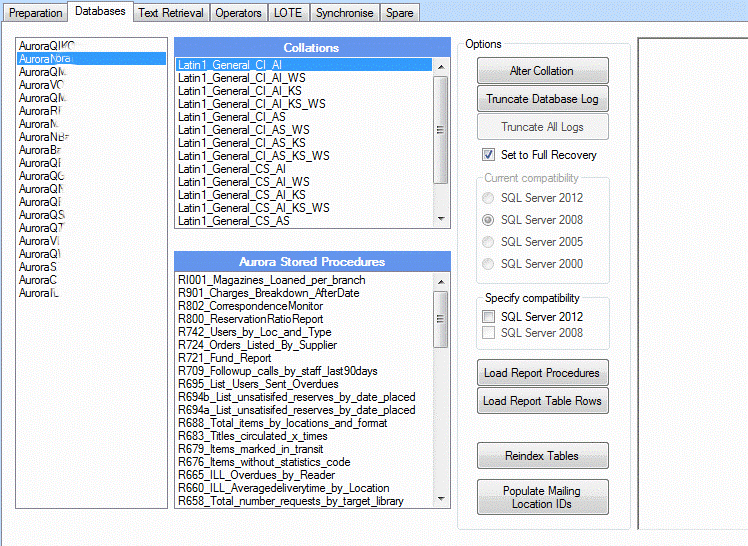
The Databases tab contains a number of controls which should be managed by the library’s network support team. Settings should not be changed without reference to AIT.
The screen display is divided into a number of panels:
Aurora database #
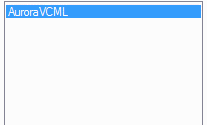
The first panel lists the databases for your installation. Normally this will be just the one, but there may be an additional training database:
Collations #
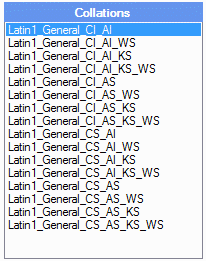
The Collations panel lists all available collation sequences for your database. This affects indexing and retrieval, and should not be changed without discussion with AIT. The default setting is Latin1_General_CI_AI. Although it says Latin, this collation can handle non-Roman characters comfortably. CI = Case insensitive; AI = Accent insensitive; meaning that case and accent are ignored for indexing and retrieval purposes.
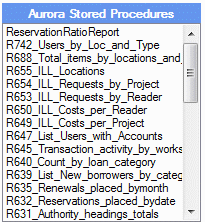
Aurora Stored Procedures #
Where stored procedures are defined for your installation, these are listed here, e.g. for reports used in Reporting Services:
Options #
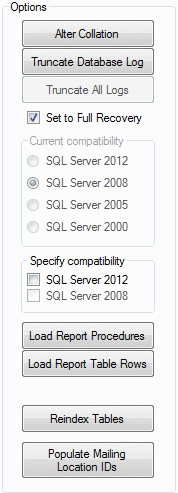
The Options panel presents a number of separate buttons:
Alter Collation #
This must not be used without advice from AIT.
| Warning:It is highly recommended that you perform a FULL database backup after running one of the below Truncate actions. This will avoid a possible break in your backup timeline when running your database in FULL mode. Please contact AIT if you have any doubts. |
Truncate Database log #
This ensures that the log size is kept minimal, and not bloated as can happen. Please perform this step before providing AIT with a backup – it has been known that backups have been provided with log files of up to 25Gb, and this can cause some issues with disk space. Please note that Truncate buttons are disabled, if addressing a SQL Server 2012 database, as this command syntax has been removed for this database version; truncation is now done as part of the backup phase.
Truncate all logs #
If your server has multiple databases and logs (e.g. where you have set up a test database), this may be used to truncate all in one sequence. Please note that Truncate buttons are disabled, if addressing a SQL Server 2012 database, as this command syntax has been removed for this database version; truncation is now done as part of the backup phase.
Current compatibility #
The process will automatically sense the SQL Server version in use, and select the appropriate radio button. You will not need to take action here
Specify compatibility #
Checkbox options are available for setting compatibility to either SQL Server 2008, or SQL Server 2012. If the database has SQL Server 2000 compatibility, it is highlighted in colour salmon, and if 2005 in orange, so as to stand out. The interface allows compatibility to be upgraded to SQL Server 2008 or SQL Server 2012 as in use locally (if not set, processes may run more slowly or be inhibited). The compatibility upgrade may be performed by clicking the relevant checkbox. Microsoft recommends doing this in Single user mode, and this is attempted by the program.
You can change the Compatibility Level of a database using SQL Server Management Studio. If applying this way, please close Aurora Systems Manager first, as single user mode will be required:
ALTER DATABASE AuroraXXXX SET SINGLE_USER
ALTER DATABASE AuroraXXXX SET COMPATIBILITY_LEVEL = 100          --SQL Server 2008
--ALTER DATABASE AuroraXXXX SET COMPATIBILITY_LEVEL = 110        --SQL Server 2012
ALTER DATABASE AuroraXXXX SET MULTI_USER
Where XXXX in AuroraXXXX needs to be changed to reflect your own database name.
Restarting Aurora Systems Manager shows database compatibility has been updated.
Generally, though, these checkboxes should be left as is, unless otherwise confirmed and advised by AIT.
Load Report Procedures #
This button should be applied following update to Schema version 172 or later. It adds a sequence of Stored Procedures which hold report definitions for use in Desktop. Note that the following button is also required.
Load Report Table Rows #
Following the load of the report stored procedures, this button should be clicked, which will write the report command line into the Inst_Reports table as new report parameters.
Reindex tables #
If there is a need to update database indexes, e.g. to populate the BDDS table for reports (especially if the local adhoc indexing using the Enterprise parameters DDS_Special_1 (through 5)) then this button can be used. Please note that this does not update Text Retrieval indexes.
The SQL script behind this (and which can be run in its own right) is:
SET NOCOUNT ON
GO

--Set the fillfactor
DECLARE @FillFactor TINYINT
SELECT @FillFactor=80

DECLARE @StartTime DATETIME
SELECT @StartTime=GETDATE()

if object_id('tempdb..#TablesToRebuildIndex') is not null
begin
drop table #TablesToRebuildIndex
end

DECLARE @NumTables VARCHAR(20)

SELECT
s.[Name] AS SchemaName,
t.[name] AS TableName,
SUM(p.rows) AS RowsInTable
INTO #TablesToRebuildIndex
FROM
sys.schemas s
LEFT JOIN sys.tables t
ON  s.schema_id = t.schema_id
LEFT JOIN sys.partitions p
ON  t.object_id = p.object_id
LEFT JOIN sys.allocation_units a
ON  p.partition_id = a.container_id
WHERE
p.index_id IN ( 0, 1 ) -- 0 heap table , 1 table with clustered index
AND p.rows IS NOT NULL
AND a.type = 1  -- row-data only , not LOB
GROUP BY
s.[Name],
t.[name]
SELECT @NumTables=@@ROWCOUNT

DECLARE RebuildIndex CURSOR FOR
SELECT
ROW_NUMBER() OVER (ORDER BY ttus.RowsInTable),
ttus.SchemaName,
ttus.TableName,
ttus.RowsInTable
FROM
#TablesToRebuildIndex AS ttus
ORDER BY
ttus.RowsInTable
OPEN RebuildIndex

DECLARE @TableNumber VARCHAR(20)
DECLARE @SchemaName NVARCHAR(128)
DECLARE @tableName NVARCHAR(128)
DECLARE @RowsInTable VARCHAR(20)
DECLARE @Statement NVARCHAR(300)
DECLARE @Status NVARCHAR(300)

FETCH NEXT FROM RebuildIndex INTO @TableNumber, @SchemaName, @tablename, @RowsInTable
WHILE ( @@FETCH_STATUS = 0 )
BEGIN
SET @Status='Table '+@TableNumber+' of '+@NumTables+': Rebuilding indexes on '+@SchemaName+'.'+@tablename + ' ('+@RowsInTable+' rows)'
RAISERROR (@Status, 0, 1) WITH NOWAIT  --RAISERROR used to immediately output status

SET @Statement = 'ALTER INDEX ALL ON ['+@SchemaName+'].['+@tablename +'] REBUILD WITH (FILLFACTOR = '+CONVERT(VARCHAR(3),  @FillFactor)+' )'
EXEC sp_executesql @Statement

FETCH NEXT FROM RebuildIndex INTO @TableNumber, @SchemaName, @tablename, @RowsInTable
END

CLOSE RebuildIndex
DEALLOCATE RebuildIndex

drop table #TablesToRebuildIndex

Print 'Total Elapsed Time: '+CONVERT(VARCHAR(100), DATEDIFF(minute, @StartTime, GETDATE()))+' minutes'

GO
Populate mailing location ids #
There is a known error in some earlier Schema updates, which may give rise to the error:
Cannot insert the value NULL into column 'ML_ID', table 'AuroraQFCL.dbo.Marc_MailingLocations'; column does not allow nulls. UPDATE fails.
The statement has been terminated.
If this message is encountered, it simply indicates that the Marc_Mailing Locations table needs to have unique ids applied – the upgrade is applying the new field and index, but because the new data element is not populated, the index will not create properly. The operator needs to run thi process to assign a running number – then run the upgrade again.
Text Retrieval #
The third tab details the processes for the setup of SQL Server text retrieval, as support to the installation of Aurora Web Service functions to a designated server.
Prerequisites #
The Server running the Aurora Web Service needs to be able to connect to an SQL Server relational database conforming to Aurora Schema v126 or later. This is all that is required to handle the Web Service Loans and Returns functions however to handle text retrieval queries on either user or bibliographic information then SQL Server Text Retrieval must be installed and selected tables must be indexed.
The following notes detail this separate set of steps to achieve text retrieval operability.
SQL Server 2005 #
For SQL Server 2005 and earlier, SQL Server Text Retrieval is an option that is selected at time of installation of the SQL Server software. If it has not been installed already (and note that it is not installed by default) you need to upgrade by inserting the SQL Server CD and including this functionality.
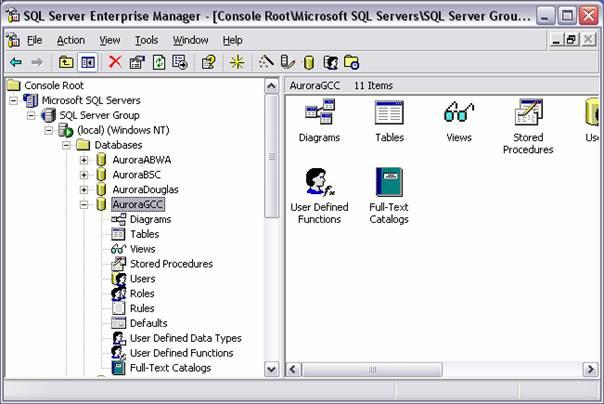
In the image below please note the ‘Full-text catalogs’ icon (echoed with a node below the Database selection in the tree display on the left). If this is not shown with your database in SQL Enterprise Manager then text retrieval has not yet been installed and you must now install it prior to proceeding.
SQL Server 2008 #
For SQL Server 2008 and later, text retrieval is set as default, and no SQL Server configuration is required.
Aurora Configuration #
The Aurora Text Retrieval process follows the prescribed Aurora Configuration, and requires both a Data Resource Definition (dr2) and Data Link (udl) file to be setup, sharing a common name, e.g. AuroraXYZ.dr2 requires AuroraXYZ.udl.
Text retrieval setup #
The following procedures can only be carried out once the SQL Server Text Retrieval option has been installed.
To assist system administrators, the SQL syntax is displayed in all onscreen operations and is reproduced in each step below.
Interface #
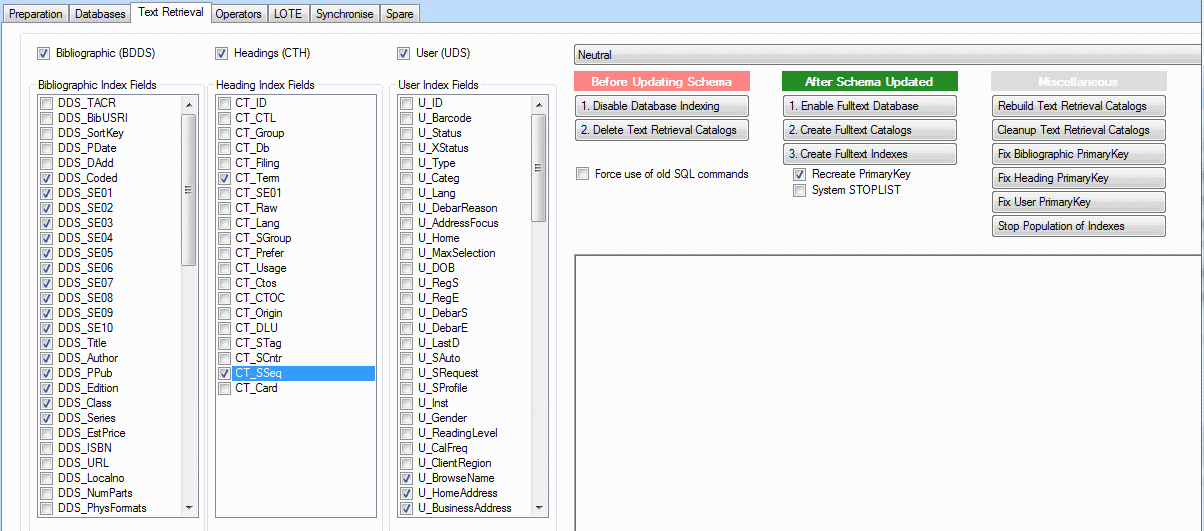
On opening the tab, the following interface is presented:
Catalogs #
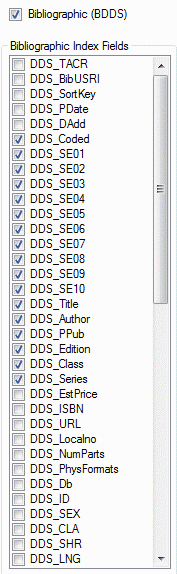
3 full text catalogs are required to be put in place: Bibliographic (BDDS), Headings (CTH) and User (UDS). Each may be specifically selected/deselected by checkbox options.
Database fields #
For each of the catalogs, a display is presented of the fields held in the database, indicating which items are to be indexed, marked by checkbox. The attributes are determined by AIT, and independent action to increase or remove index attributes should not be taken without discussion with AIT.
Command panel #
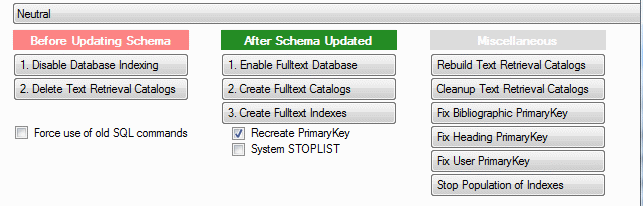
The command panel to the right of the field display holds all commands, which are discussed in detail below. Note that the commands are gathered into distinct sections.
Collation sequence #
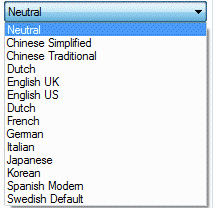
At the head of the command panel, a combo presents options for Collation sequence attributes – these are used in the formatting of index keywords, and sorting. Unless otherwise instructed, the default of Neutral should be used:
Before updating schema #
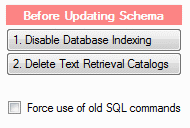
As indicated when the program is opened, for version 176 and later, it is essential to disable indexing and delete the existing text retrieval indexes, using buttons 1 and 2 here:
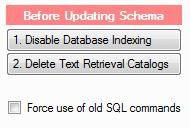
A checkbox below the buttons allows the operator to ‘Force use of old SQL commands’ – this is only necessary where the database to be updated is SQL Server 2000.
After Schema updated #
This set of commands provides the steps to follow following completion of the Schema update to recreate the text retrieval indexes:
The buttons presented are:
-
- 1. Enable Fulltext Database
-
-
- This command simply enables full-text indexing on the selected database.
-
| Warning: AuroraDB is a generic name that will be replaced by the specific library database name |
USE AuroraDB
EXEC sp_fulltext_database 'enable'
Succeeded
-
- 2. Create Fulltext Catalogs
-
-
- This command creates the required Bibliographic (DDS), Headings (CTH) and User (UDS) catalogs
-
| Warning: AuroraDB is a generic name that will be replaced by the specific library database name |
USE AuroraDB
EXEC sp_fulltext_catalog 'DDS', 'create'
USE AuroraDB
EXEC sp_fulltext_catalog 'CTH', 'create'
USE AuroraDB
EXEC sp_fulltext_catalog 'UDS', 'create'
Succeeded
-
- 3. Create Fulltext indexes
- Once the catalogs are created, then the specific indexes for each will need to be setup. Note that a change may be required to the Aurora schema: it is possible that the Primary Key details need to be updated: if this Failure message is encountered, then the Maintenance processes to fix the primary keys will need to be invoked [if this is not the case,]
- 3. Create Fulltext indexes
| Warning:AuroraDB is a generic name that will be replaced by the specific library database name |
USE AuroraDB
EXEC sp_fulltext_table 'BDDS', 'create', 'DDS', 'PrimaryKey'
'PrimaryKey' is not a valid index to enforce a full-text search key. You must specify a unique, non-nullable, single-column index.
Failed
Checkboxes #
Two checkboxes are provided:
-
- Recreate PrimaryKey – which provides for (default) automatic recreation of the required primary key – this should not be unchecked unless advised.
-
- System STOPLIST. By default, this should not be ticked, and this allows system Stoplist to be bypassed. If the Stoplist is applied, then a number of common words will not be indexed, and therefore not retrievable.
Miscellaneous #
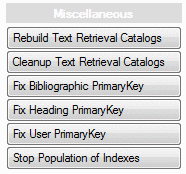
This collection of commands will not normally be used, but they are available should thy be required. AIT will advise on the suitability of these.
-
- Rebuild Text Retrieval Catalogs
-
-
- This process allows a rebuild of a catalog, and may be needed if corruption of data is encountered.
-
-
- Cleanup Text Retrieval Catalogs
-
-
- After a period of operation, it may be necessary to run this utility which removes redundant links and data.
-
-
- Fix Bibliographic PrimaryKey
-
-
- This command will update the index attributes for the table BDDS, to allow Full-Text indexing to proceed for bibliographic searching:
-
| Warning: AuroraDB is a generic name that will be replaced by the specific library database name |
USE AuroraDB
DROP Index BDDS.PrimaryKey
USE AuroraDB
UPDATE BDDS SET DDS_BibUSRI =  WHERE DDS_BibUSRI IS NULL
USE AuroraDB
ALTER TABLE BDDS ALTER COLUMN DDS_BibUSRI VARCHAR(11) NOT NULL
USE AuroraDB
CREATE UNIQUE CLUSTERED INDEX PrimaryKey ON BDDS (DDS_BibUSRI)
Succeeded
-
- Fix Heading PrimaryKey
-
-
- If the Bibliographic Primary Key causes a failure as above, it is almost certain that the same will happen for the Headings Primary Key, and so the associated Fix should be run before proceeding.
-
-
-
- This command will update the index attributes for the table CTTerm, to allow Full-Text indexing to proceed for Heading searching
-
| Warning: AuroraDB is a generic name that will be replaced by the specific library database name |
USE AuroraDB
DROP Index CTTerm.PrimaryKey
USE AuroraDB
UPDATE CTTerm SET CT_ID =  WHERE CT_ID IS NULL
USE AuroraDB
ALTER TABLE CTTerm ALTER COLUMN CT_ID VARCHAR(10) NOT NULL
USE AuroraDB
CREATE UNIQUE CLUSTERED INDEX PrimaryKey ON CTTerm (CT_ID)
Succeeded
-
- Fix User PrimaryKey
-
-
- If the Bibliographic Primary Key causes a failure as above, it is almost certain that the same will happen for the User Primary Key, and so the associated Fix should be run before proceeding:
-
| Warning: AuroraDB is a generic name that will be replaced by the specific library database name |
USE AuroraDB
DROP Index UserReport.PrimaryKey
USE AuroraDB
UPDATE UserReport SET U_ID =  WHERE U_ID IS NULL
USE AuroraDB
ALTER TABLE UserReport ALTER COLUMN U_ID VARCHAR(10) NOT NULL
USE AuroraDB
CREATE UNIQUE CLUSTERED INDEX PrimaryKey ON UserReport (U_ID)
Succeeded
Once the Primary Keys have been fixed, index operation may be restarted.
-
- Stop population of Indexes
-
-
- This process should only be run after consultation with AIT. This process inhibits continued indexing.
-
-
-
- Refer to AIT
-
Cancel #
A Cancel option is also provided at the foot of the Command panel
Feedback #
At the base of the screen a panel is provided which provides feedback and progress information as each command is processed. This clears for each command and should be selected and copied to mail to support any query returned to AIT with regard to any of the processes described.
Operators #
The Operators tab provides means to assist in the management of operator logons in an Active Directory environment. Specifically, it provides for the update of an operator id, .e.g. where the associated network id is periodically changed, so that consistency can be maintained throughout Aurora, by replacing all instances in all tables of the current operator id with the new id.
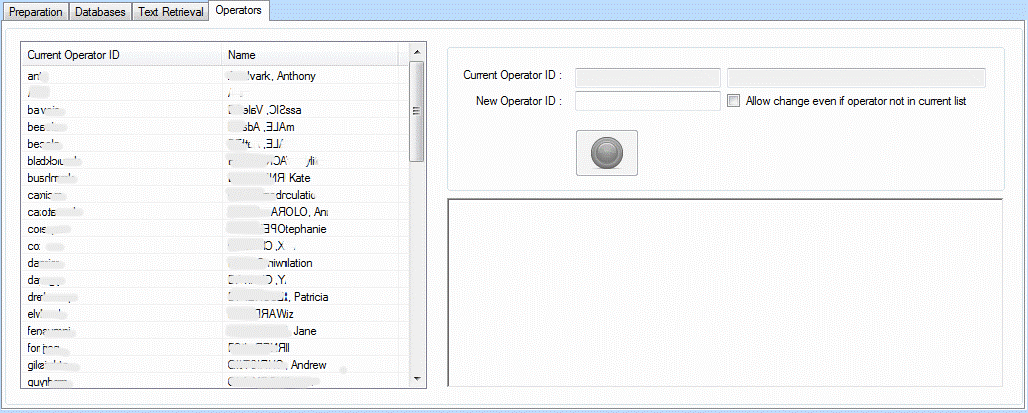
The Operators tab opens to list all currently registered operators:
Current operator list #
A panel lists all current operators, alphabetically by their id, and shows their name (deliberately obliterated here):
Control panel #
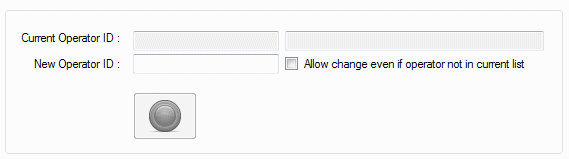
To the right is a control panel. Initially this will be blank:
but when an operator id is selected, this will enliven:
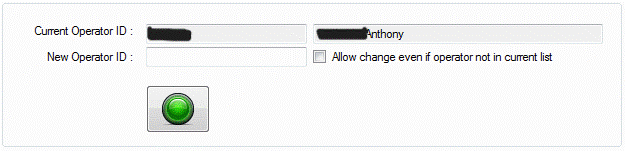
The panel now shows the selected operator id and name, and invites a new operator id to be entered. With one in place, the id may be changed using the green command button:
Immediately, Aurora will ask for confirmation of the action, and warn that updates may take time to process (this will increase over time as more updates will need historically to be applied):
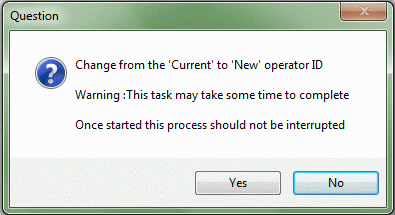
The process should not be interrupted when under way.
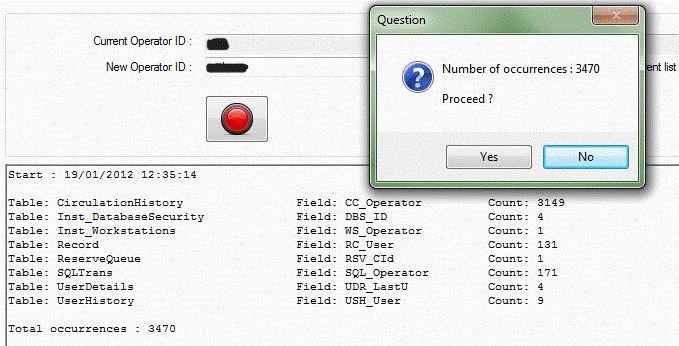
Aurora will first identify the scale of the update requirement, and list the instances of the operator id in the various tables checked; and request confirmation that the update should proceed:
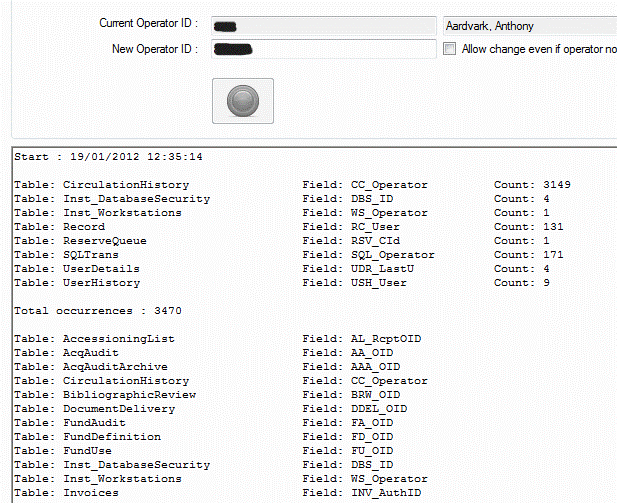
The update is now performed and the specific table updates are confirmed, and all other tables checked are listed too:
Historical change #
Note that there is another checkbox on the Control panel ‘Allow change even if operator not in current list’. If this is selected, then it is possible to change the id of an operator that is recorded in tables but is no longer active and so has been removed from the current operator list.
LOTE #
The LOTE tab is provided to allow synchronisation of interface elements to alsupport creation and maintenance of non-English interfaces.
The screen opens so:
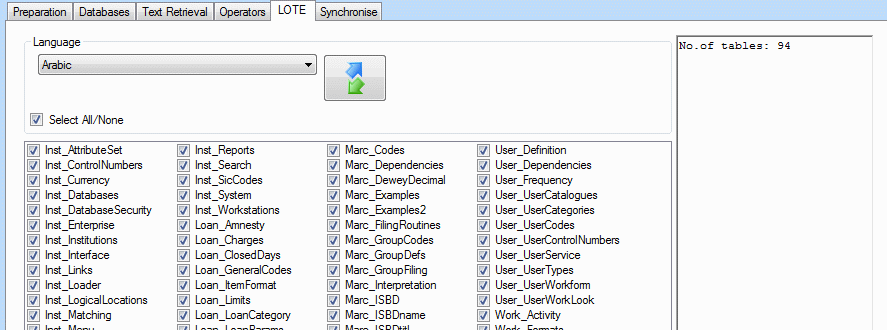
and has a simple control panel with three objects:
Language selection #
A combo is presented listing the possible language options. These options are taken from the library’s users’ details, so if a user is listed as having Ukrainian as their main language, then this will be presented as an option; if there are no speakers of a specific language, then the option is not presented.
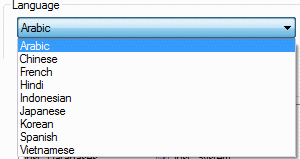
#
One command button is presented:

This allows the synchronisation for the selected language to take place.
Tables to be addressed #
Under the command [Language] panel, all tables to be addressed are listed. This is in effect the set of parameter tables. A checkbox on the command panel allows selection of all or none. By default All are selected.
Maintenance and update #
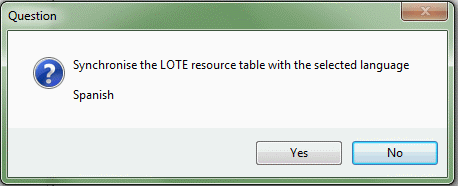
The synchronisation may be started by selection of the language and clicking the command button. This will go through the selected tables in sequence and verify the presence of the data elements in the target database table – ResourceLOTE -this table is added in schema update 172. At time of writing, there is no interface to present this table’s entries for translation. As new data elements are added, the synchronisation can verify that a new language element is written to the Resource LOTE table – it always then has its own id and the default English label, prefixed by the USMARC three letter code for the language, e.g. Title is written as ‘fre Title’.
The log panel on the right will detail the progress of the synchronisation; any errors should be noted and reported to AIT.
Synchronise #
This tab is used to synchronise local databases with centralised parameter changes, where these changes are more major (simple changes can be applied as part of application update).
On opening, the tab will show:
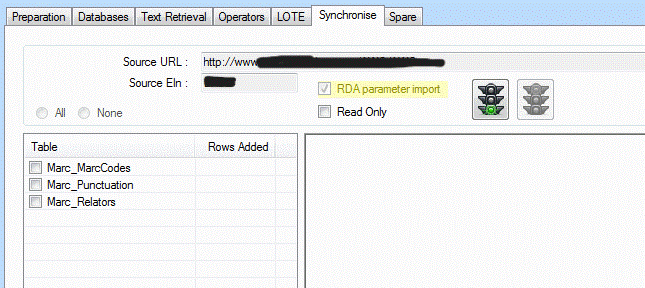
There are three panels:
Control panel #

This panel holds the operational controls for the synchronisation process:
- Source URL: this is the URL for the AWS (Aurora Web Service) location. This is set to be the central Aurora instance, ensuring that it is the latest available.
- Source EIn: this is set to BASE, i.e. the Aurora baseline parameter set, which is usd to hold all parameters which are not subject to local variation (in the normal course of things)
- Checkboxes. A number of checkbox options may be presented for variations in the synchronisation processes.
-
- RDA parameter import. This is the only option currently available. This allows update to include new MRC parameters for use in RDA cataloguing
-
- Read-only. The read-only option allows a dry run for checking what will be delivered in a synchronisation pass
- Radio buttons. Not currently in use.
-
- All
-
- None
- Command buttons. 2 command buttons are provided to start and interrupt the process.
Tables panel #
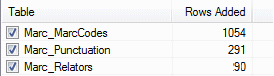
The Tables panel shows the tables included in a synchronisation process. These will vary according to process. Each table may individually be selected using its associated checkbox. When the process is completed, the number of parameter rows processed will be shown, and the update details shown in the log panel
RDA parameter import #
This process addresses the requirements of the RDA update for cataloguing and specifically addresses three tables:
-
- Marc_MarcCodes
- Marc_Punctuation
- Marc_Relators
Log panel #
On compilation of a synchronisation process, details of the updates applied are shown in the log panel. If running ‘read-only’, these details may be previewed to confirm that they are as required.