User Lists  #
#
User Lists provides a means for identifying users according to a large number of criteria.
Selection can be by a simple characteristic, or characteristics can be combined, e.g to identify all borrowers of a specific type with normal status, male, named ‘Smith’, with a birthdate in a given range, and with current loans – or to do the same, but for all borrowers in a specific address or postcode.
The User Lists search form is made up of a control panel and six tabs.
Control panel | Main | User types | Date ranges | Profile | With | History

Control panel #
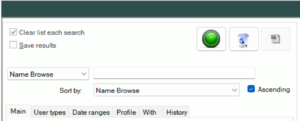
The Control panel allows selection of specific criteria for identification of a user or a group of users, and the sort to be applied to the selection. This panel also includes checkboxes and command icons.
Command icons #
Three separate command icons are provided:
 Invokes the search.
 Clears both search terms (including any filters) and results, to reset the screen
 Allows results to be exported to Excel. The Excel file is saved to the Work directory as ‘User_Lists_<date>_<workstationname>.xls, and may be opened in the application.
Filter flash #
When any of the filter options are being included in a search in any of the tabs is applied a flag indicator ![]() is shown next to the search argument text box.
is shown next to the search argument text box.
Filters can be cleared using the Clear command button.

Checkboxes #
7 checkbox options are provided overall [note that not all are shown concurrently]:
Clear list each search
This is set ticked by default and allows the results of a search to be cleared when the next search is invoked. If unticked, then search results can be combined, e.g. to identify all users in address A AND address B.
Save Results + CSV
When this is selected, an addition tick box of Save as CSV appears. Search results (as a list of users and addresses) is saved to an XML file in the defined ‘local’ Desktop folder if CSV is not ticked. This is specifically provided to afford a user list for use in the Aurora Post utility, but of course, the file can also be used as required locally. Once a list is saved, a hyperlink will be generated to allow the file to be opened in your browser for XML and in excel for CSV.
[note that if user status selected is Deceased or Deleted, then the Save results option is hidden]
Toggle all/none – this option is only presented when the User Types tab is selected and allows the selection to be set at all user types, or none.
Surname only – this option is only presented when a Name Search argument is selected: with this selection, only names matching the input key in the surname element will be shown – for instance, entering ‘john’ and ticking this will get surnames: John, Johnson, Johnstone, etc., but not users with forename John or Johnny.
Exact – this option is only presented when a Name Search argument is selected: it applies an exact match to the entered key – so if ‘john’ is entered, and surname checked too, then only users with surname John will be returned.
Home address – this is only shown when an Address Search is selected: then just the defined home address field is searched: not additional addresses, such as the Business address.
Search argument #
If required for focusing a search or browse, an entry can be made in the Seach argument textbox. Note that while this may be crucial when looking for a specific name or address, this textbox does not need to be entered for more general enquires, where the argument is supplied by a selection, e.g. to list all users of a particular type.

Search Options #
The argument filter – labelled ‘Name Browse’ – allows a drop-down menu of search type options.

User barcode – A truncation option is available allowing consistent barcode prefix data to be dropped from manual keying input.
User id – (i.e. the Aurora User record number) -The leading zeroes of an id are optional – so either 0000045715 or 45715 is ok
Name browse – Browsing for a name allows entry of full or partial keys:
- smi will select all names from SMIAA to SMIZZZ
- smith will just select names matching SMITH
- smith, j will select all names matching SMITH with forename beginning J
- smith, jan will select names matching SMITH with forename Jan, Jane or Janet (etc)
- smith, jane will select names matching SMITH with forename Jane or Janet (etc)
NOTE that if there is no Jane Smith and smith, jane is entered, then no results are shown – similarly if key XZKJ is entered, no resulting surnames will match and be shown.
Name Search – This provides extra controls with Surname only, or Exact match checkboxes. The option provides full keyword search functions allowing boolean combination and truncation.
Address search – This provides an extra control to limit the search to the Home Address. The option provides full keyword search functions allowing boolean combination and truncation and includes home telephone as a searchable element within the address.
Mobile phone no – Truncation is not supported, and the number should be entered with no spaces or hyphens.
Sort options #
Results may be sorted to operator requirements (sort is applied as part of the results display, so to sort into a different order, the search must be resubmitted with a different sort selection.
Sort options provided are:
- Name browse
- User barcode
- Date of birth
- Date last active
- Date joined
- Date of membership acceptance
- Date of transaction (this option is only available when the selection is for a user’s last loan location in the Date ranges tab)
Additional sort #
In addition, further display specific sort options are afforded by With selections Tab (default Descending):
- Loans — Count of loans
- Charges — Sum of charges
- Reserves — Count of reserves
- Requests — Count of requests
- Suggestions — Count of suggestions
- Inter-Library loan requests — Count of Inter-Library loan requests
- Picking list entries — Count of Picking list entries
- Subscriptions — Count of Subscriptions
Main – details #
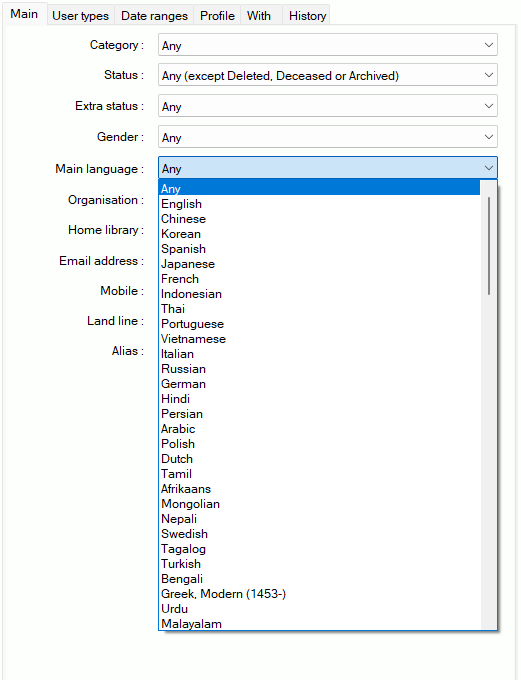
The Main tab presents the primary selection options. Selection can be simple or compound, as required.

Category #
The user category may be used to identify users on that basis, e.g. all Libraries, using the drop-down selection menu.
Available options
Any | Library | Supplier | Reader | Staff | Institution.
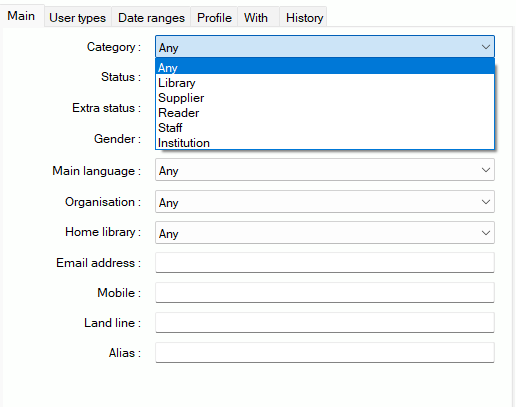
Note that these are fixed categories and do not vary.
Status #
A selection may be made according to the current user status. The default option will filter out users who are marked as Deleted, Deceased or Archived:
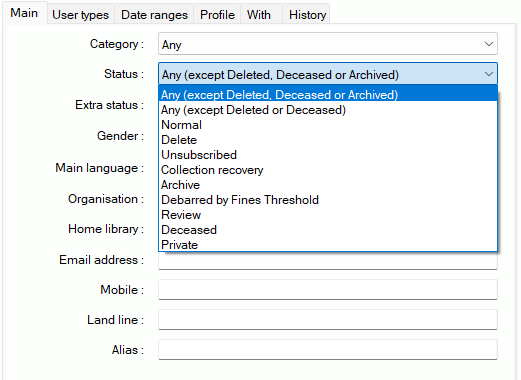
Note that if a status of Deleted or Deceased is explicitly selected, then the Save Results checkbox is hidden.
Extra Status #
Extra status – optionally defined by the library – can also be set and used for selection.
Extra Status are added in the User Codes section of System Parameters
Gender #
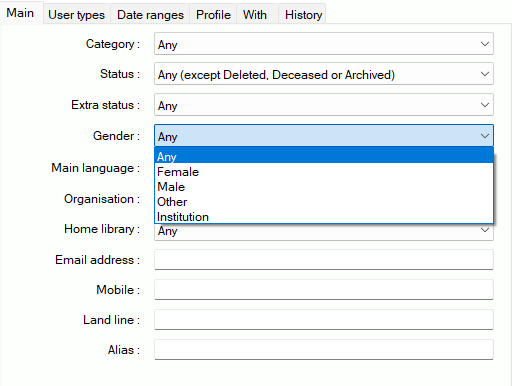
Gender may be used to qualify a search:
Main language #
Results can also be filtered by the user’s main language. The options presented here can be tailored to a library’s requirements. Please contact AIT if variations are required.
Organisation #
If the database has Council entity values (as in Consortium systems, like RLQ), Aurora Desktop defaults ‘User Lists’ to the workstation’s Council, which is selected as ‘Organisation’ here.
You can change the Council in the Dropdown box and when you do the home branches are now repopulated to the specific Council.
Home branch #
You may also choose to select – or qualify – according to the user’s home branch.
If ‘Any’ Organisation is chosen then all Home libraries in the database are listed, allowing a system wide search, or a Council wide search (default), or a single Home library search to be performed.
Additional #
You can also explicitly search for:

Email address | Mobile phone number | Land line number | User’s alias
User Types #
The User Types tab presents the full list of user types defined for your library – for all user categories – and so will vary according to library. Each user type has a checkbox allowing selection; by default, all types are selected:
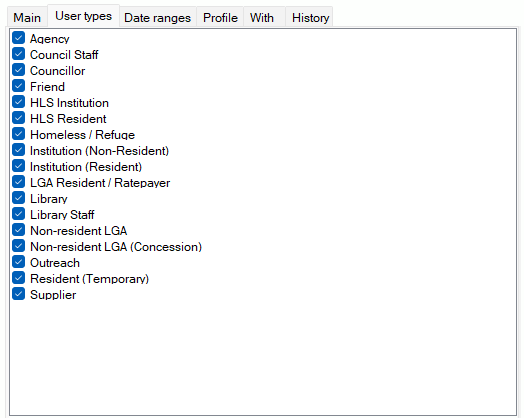
When this tab is selected, a checkbox is then available: Toggle All/None – this allows the ticks to be removed from all types – useful if just one or two types are actually required, as this means you do not have to remove many ticks to achieve the result.
Date ranges #
This tab presents a set of options allowing specific listing of users according to date characteristics:
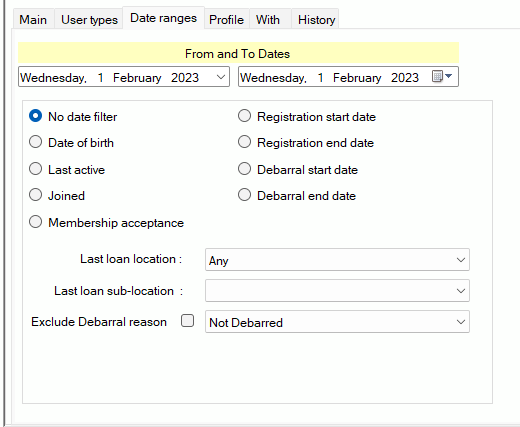
Each date range option allows a specific from and to date to be set – and with a preliminary radio button to set ‘No date filter’. The selection options are:
- No date filter (this can be used to cancel a previously applied filter)
- Date of birth
- Last active
- Date joined
- Date of membership acceptance
- Registration start date
- Registration end date
- Debarral start date
- Debarral end date
This tab also has further options to identify users by their last loan location. This may have particular use in the context of a mobile library service but allows a further option for analysis of readership profiles.
Note that the sub-location (physical locations within a branch) may not be selected if no branch has been selected.
Profile #
The Profile tab provides further selection options reflecting additional user attributes:
Checkboxes
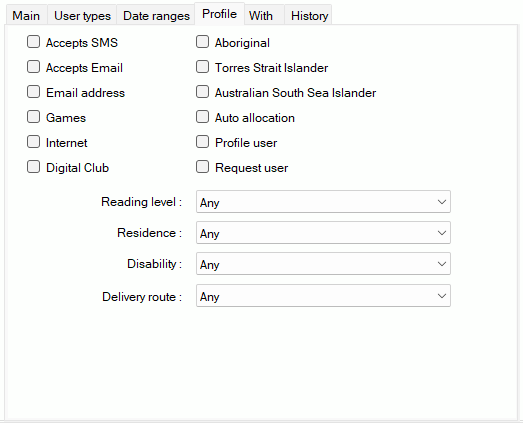
- Accepts SMS
- Accepts Email
- Games allowed
- Aboriginal
- Torres Strait Islander
- Australian South Sea Islander
- Internet allowed
- Auto allocation
- Request user – for Libraries for the Blind/Homebound application
- Profile user
- Digital Club
- Email Address
Note that multiple checkboxes may be selected if required.
Reading level drop down list:
- Any
- Unknown or not specified.
- Preschool
- Primary
- Elementary or junior high
- Secondary (senior high)
- Adult
- Specialised
- General
- Juvenile
Residence drop down list:
Drop down options include.
- Any
- None or not specified
- Resident
- Non-resident
- Hospital Resident
- NH Resident
- Own residence
- RV Resident
- Hostel Resident
- Unknown
Disability drop down list:
Drop down options include
- Any
- None or not specified
- Blind
- Deaf-Blind
- Deaf-mute
- Multi-handicapped (physical)
- Intellectually challenged.
- Print challenged
Delivery route drop down list:
This is provided to allow all of the users set for a specific delivery route to be identified, e.g. when the homebound delivery is set up to go out.
With #
The With tab allows any previous selection to be qualified where the user has been active in specific areas:
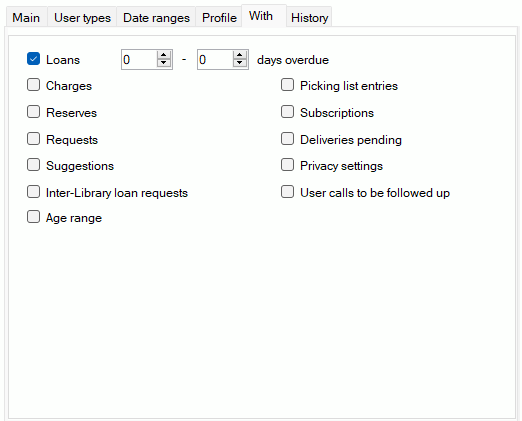
The areas available are:
- Loans
- Charges
- Reserves
- Requests (for Libraries for the Blind)
- Suggestions
- Inter-Library Loan requests
- Age – Selecting this checkbox give the option to enter in a range.
- Picking list entries (for Libraries for the Blind)
- Subscriptions
- Deliveries pending (for Homebound Services)
- Privacy Settings – Selecting this checkbox creates an additional box for specific privacy setting e.g. marketing is allowed.
- User has calls to be followed up
Privacy settings #
Of these, if Privacy Settings is selected, then a further panel is displayed:
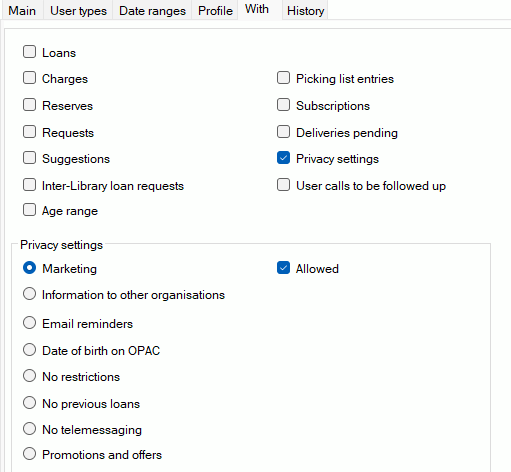
This panel allows settings for a user’s privacy to be used as filters. This identifies:
- Marketing
- Information to other organisations
- Email reminders
- Date of birth on OPAC
- No previous loans
- No telemessaging
- Promotions and offers
with each having a toggle to determine if the setting is ‘Allowed’ or not. The individual user may be set for any of these settings in the User Details /Security tab for their record.
Note that a default option of ‘No restriction’ is available to clear any of the settings.
Additional sort #
and in addition, further display specific sort options (in the control panel) are afforded by With selections (default Descending):
| Loans | Count of loans |
| Charges | Sum of charges |
| Reserves | Count of reserves |
| Requests | Count of requests |
| Suggestions | Count of suggestions |
| Inter-Library loan requests | Count of Inter-Library loan requests |
| Picking list entries | Count of Picking list entries |
| Subscriptions | Count of Subscriptions |
History #

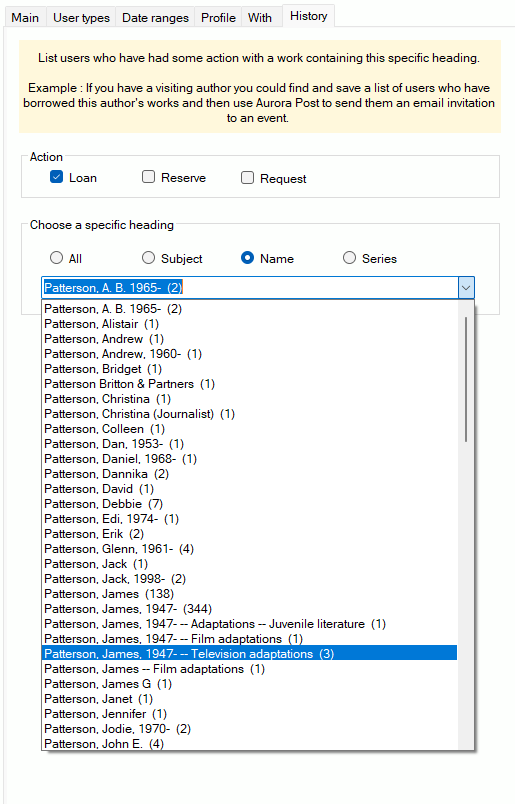
This tab allows selection of any user who has had some activity with a work containing specific headings. This can be used as a general enquiry but has specific value in context of linking to Aurora Post, allowing identification of all users who may have borrowed works by an author visiting the library; or works in a specific subject area in conjunction with a library exhibition. The user results may then be saved and used in conjunction with a general letter advising of the event and inviting attendance.
Action #
The actions referenced and selectable by checkbox (multiple choices are ok) are:
- Loan [default]
- Reserve
- Request
Heading #
Radio buttons are provided to allow the specific heading group:
- All
- Subject
- Name [default]
- Series
When the group is selected, the start of the heading can be entered in the textbox below the radio buttons. Hit Enter, and this will then create a browse list of headings, starting with your entered key: you can then select one of the headings for the report. (Note that the number of works associated with the heading is indicated in brackets):
Results #
Results are displayed in the right-hand panel. Note that if an immediate sort is required, this must be specified in the Sort options before the search is made.

Results are displayed in the following columns:
- Surname
- Given name
- Initial
- Title
- Barcode
- Mobile
- Land line
- User type
- Address
- Birth Date
- Last active
- Home Library
- Reading Level
- Extra Status
- Max Titles
- Status
- Exception Information
- User ID
- Additional Columns can become available if selected in the With Tab
#
With a display of results, the operator can use a right mouse click to bring up a pop-up menu allowing a range of user views:
Options provided at the top level are:
- Go to Loans
- Go to User Details
- Go to User Links
- Go to Audit History
- Go to Housebound
- Go to Reservations
- Go to User Merge
- Go to Bookings
- Merge
- Housebound – set user for automatic allocation.
Go to Loans #
This selects the user for a Loan and takes you to the Loans screen with that user then immediately set up.
Go to User Details #
This option provides a subsidiary menu selection:
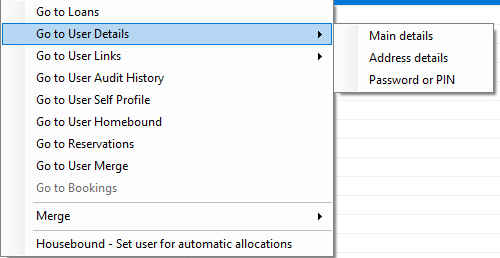
allowing selection of:
- Main details
- Address details
- Password or PIN
Go to User Links #
The User Links option allows selection of the specific target information to be displayed:
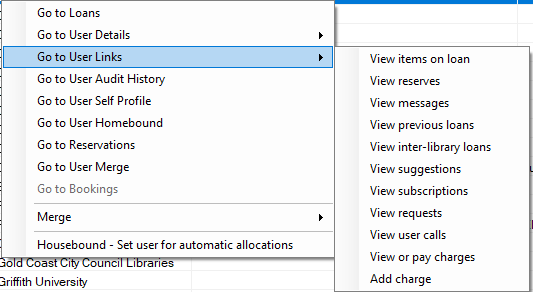
and provides direct links to:
- View items on loan
- View reserves
- View messages
- View previous loans
- Inter-Library Loans
- View subscriptions
- View requests
- View user calls
- View or pay charges
- Add charge
Go to User Audit History #
This takes the user number and applies it to the base Audit History screen allowing inspection of the user’s previous transaction activity – loans, returns, overdues, charges, and much more.
Go to User Housebound #
Where the library runs Homebound Services, this will show the user’s Home bound settings.
Go to Reservations #
This shows the main Reservation screen, using the selected user id for the application of a reserve.
Go to User Merge #
Selecting this option will take you to the User Merge screen, allowing for action to merge two user records. This option does not automatically take the selected user detail across to that function (as the function here may have simply been used to check/verify the details of a third potential duplicate record. To use the current user in a merge process, select the next option Merge.
Merge #
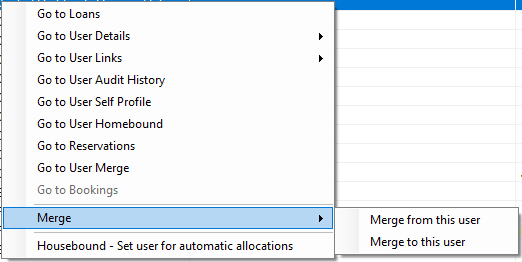
This menu option presents two further sub-menu options:
- Merge from this user
- Merge to this user
Each of these will take you to the User Merge screen, allowing for action to merge two user records, selecting the current user as respectively the source and target for merge action. [Note that in fact the Merge screen allows swapping of source and target]
Export #
Results may be exported for manipulation or printing using the Excel command icon. ![]()
NOTE This will only export the results on the screen e.g. Hist/Page. if you need to export a list with a large volume of users the save results – CSV option would be preferable.
