Digital Catalogue  #
#
The Digital Catalogue feature provides special capability for the cataloguing of digital images – for example in the context of a Local History collection. The feature must be initially set up – see here – and allows for the control of pre-set number images in parallel sequences of thumbnail, medium and large sized images, allowing for delivery via WebOPAC, and also for export to an external photographic agency, e.g. Picture Australia
The feature is specifically designed to identify and display available images, and to allow them to be catalogued – using MARC to allow import into the Aurora Bibliographic database, and also Dublin Core to permit export to Picture Australia.
The screen layout below and is made up of separate panels, described below.
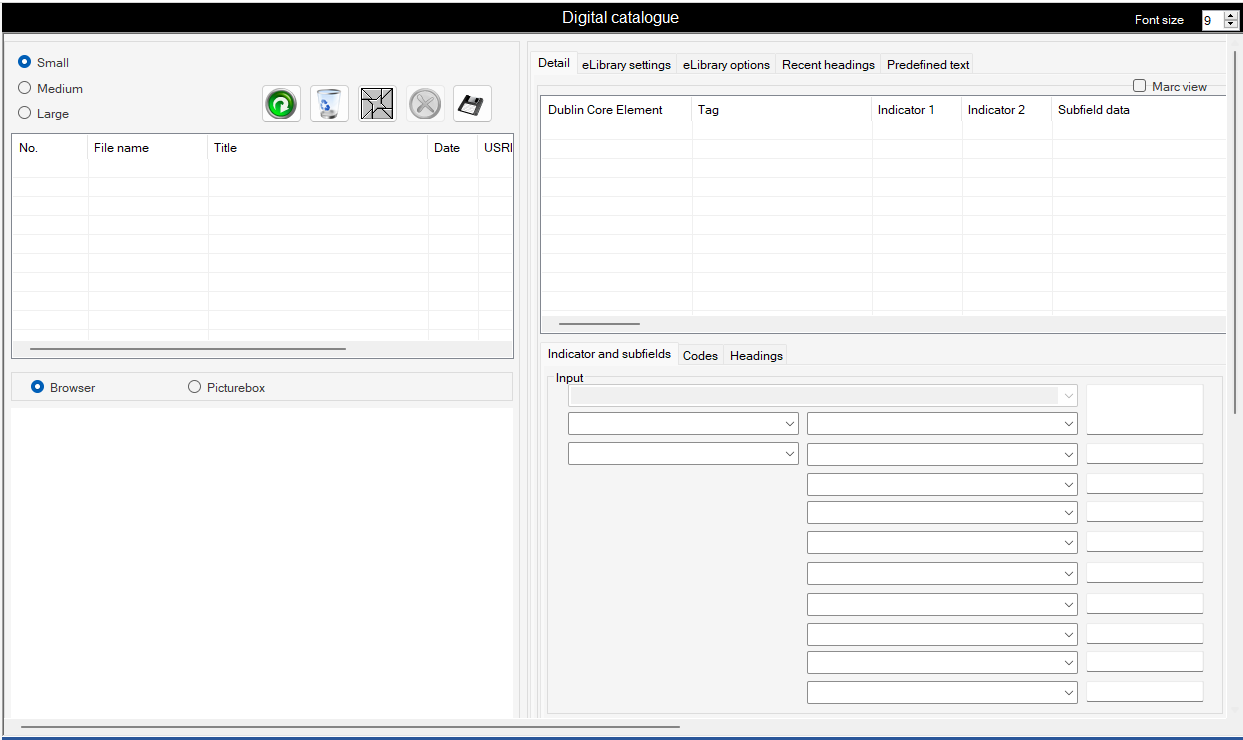
Controls #
A set of three radio buttons is placed top left, and allows selection of the specific image file to be examined:
- Small
- Medium
- Large
Provision is made for three versions of the same image in different resolutions. Thumbnails are advised, as the initial display in enquiry methods can use this, rather than large image files, meaning that overall delivery can be much faster. It is not mandatory to have all three image styles. Digital cataloguing settings sets the location of the image folders.
Image File Listing #
On selection of one of the radio buttons [if necessary there is a refresh button], the currently available image files will be listed below in filename order:
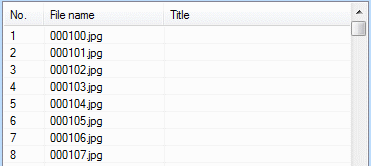
Note that on initial listing, there is not likely to be a title or other information attached to the file – as this is the function of the Digital Catalogue feature.
Command Buttons #
A selection of command buttons is also provided above the file listing:
There are six separate command buttons (Note that the first listed below is not shown when thumbnails are selected) :
 Allows batch creation of thumbnails from large or medium images
 Refreshes the image list, e.g. to ensure most current information is displayed
 This button allows any images which have been catalogued to be removed from the display. Note that this does not delete them – simply clears away what has been done, to reveal what still needs to be done.
 Provides a function to renumber images
 Deletes a file
 Saves changes to the file, i.e. when cataloguing is completed.
Tabs #
Detail #
As in Cataloguer the detail tab allows the operator to input the bibliographic data for the resource.
eLibrary Settings Tab #
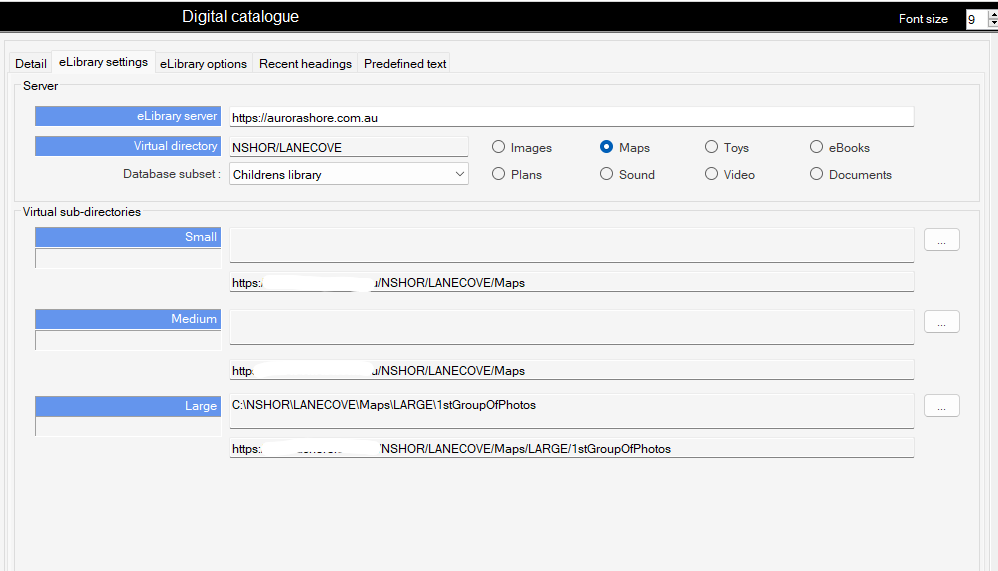
The Image Directories tab presents information relating to the location of the target images in your network. The basics of this are performed as part of the initial setup.
Server #
Image Server – This will be pre-set and should not be changed without advice from your network administrator.
Virtual directory – The Virtual directories are a consequence of the initial setup but allow the cataloguer to change specific folder to view different sets of images. e.g. Images, Maps, Toys
Virtual sub-directories #
The operator can use the Explorer button […] to browse available folders and select a different folder. Note that each separate resolution should be set in parallel.
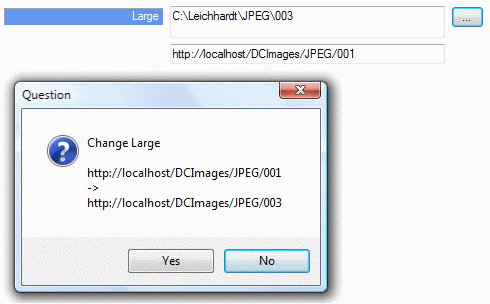
If a Windows directory is changed, then a message is given, asking if the associated virtual directory should change in line. Normally, this would be expected, but it is not mandatory – please check locally for specific instruction.
eLibrary Options Tab #
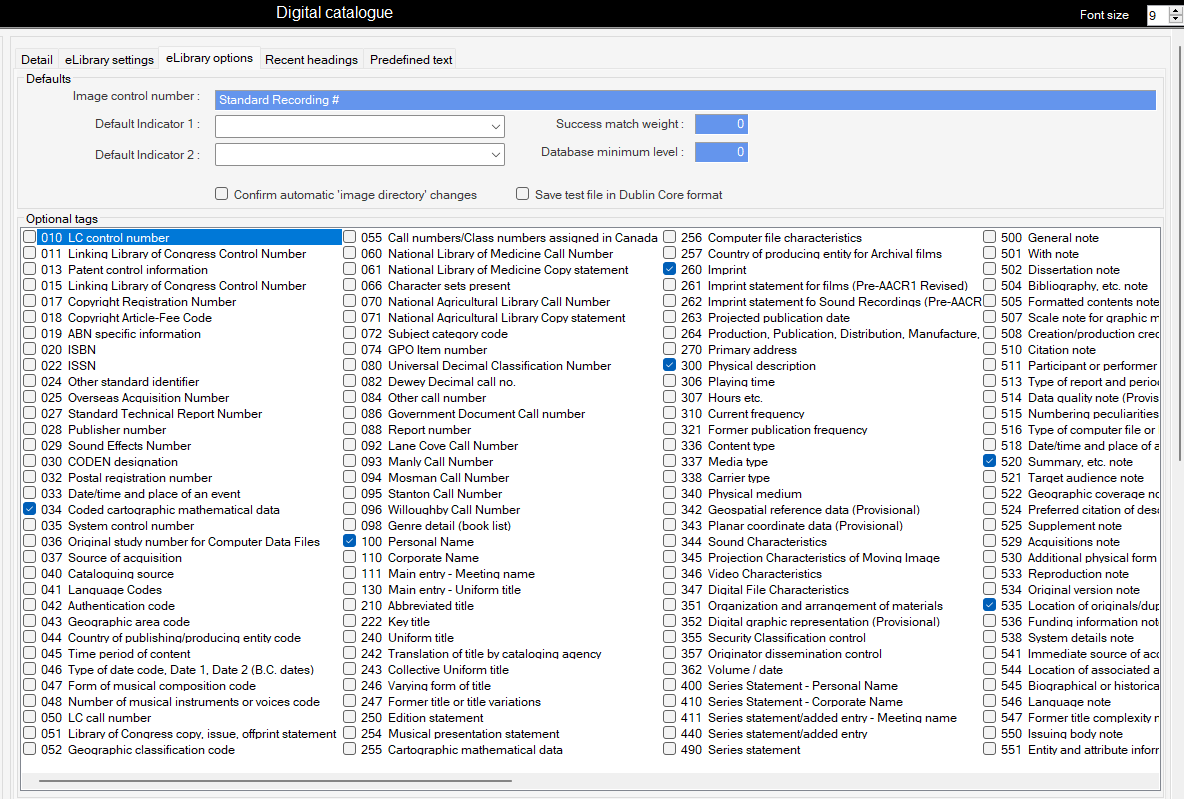
The third tab ‘Image Options’ contains two separate panels.
Defaults #
The first defines some important structural information for the image cataloguing process, by determining default values for:
Image Control number
Each record must have a known control number, and for Aurora purposes this is defined in the Control Numbers parameter table. AIT recommends that the default control number be set to 024$a – the Standard recording number. If additional options are required, please discuss with AIT.
Default indicator values
This allows default indicator values to be set for the 024 control number field:


Initially these are set as 0 and _
Matching parameters
The Matching values for ‘Success match weight’ and ‘Database minimum level’ are displayed here. This is for information only, and cannot be changed here.
Save Test File checkbox
This is a temporary test tool which will be removed in due course. When this option is selected and the record saved, a test Dublin Core record is written to the Aurora Work folder, to allow examination of the export format.
Confirm automatic image directory changes checkbox
#
The lower panel contains a full listing of the available MARC tags defined for the database. Those that are set by default for the cataloguing form are already ticked; if another tag is required, its checkbox may be ticked and it will immediately be made available on the current form.

Recent headings Tab #
A ‘Recent Headings’ tab is provided to accumulate up to 100 currently used headings:

By gathering current headings in this way, the application helps where multiple image sets relating to a common topic or building are being described and recorded. The listing indicates the number of hits already recorded for the heading, and supports a pop-up menu option for adding the heading directly to the record:
Predefined text Tab #
The final tab holds the ‘Predefined text’ assignments, to be used a standard note in collection descriptions, e.g. a note re images respecting Aboriginal and Torres Strait Islanders:

The interface allows up to 10 separate texts to be saved – per workstation. The Predefined settings are saved in a file name in this format.
Cataloguer_<InstitutionID>.xml
So when you connect to, say, QXYZ they will be saved as Cataloguer_QXYZ.xml. When in a Consortium you change your workstation to another council, they will then save according to the new Council id, e.g. Cataloguer_QABC.xml. So switching between branches within a Council in a Consortium (or within a stand-alone system) will retain full consistency, but switching between Councils will create parallel definitions.
