Box of Items  #
#
The Box of Items is a flexible approach to handling items in a variety of ways:
- Transferring an item from one bibliographic record to another (e.g. where it has been added to the wrong record)
- Creating a new box allowing a box of items, e.g. from State Library, to be handled easily
- Gathering items for a bulk loan
Display and controls #
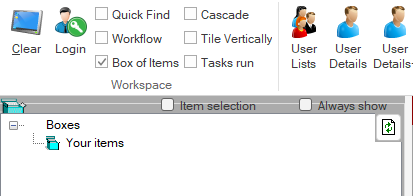
The visibility of the box is controlled by a checkbox in the Workspace section of the Circulation toolbar. When opened for the first time this will show the default ‘Your items’ box, which we will use below.
Tree structure #
As boxes are created, they will be displayed in a ‘tree’ structure, with ‘Your items’ always at the top:
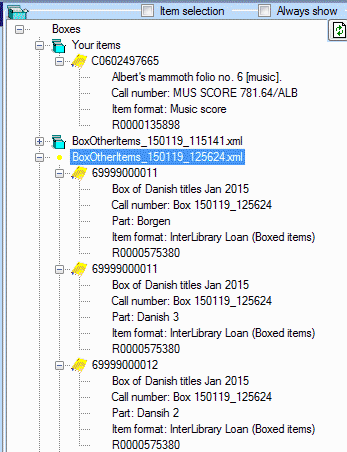
Two checkboxes are available at the top of this panel:
- Item selection – this provides each node in the tree with a checkbox, allowing selection of individual items.
- Always show – this will keep the box on screen while you are working on it; if this is not checked, then moving to a new screen will disappear the box details, but they can be retrieved in the same state as they were, using the checkbox on the toolbar.
#
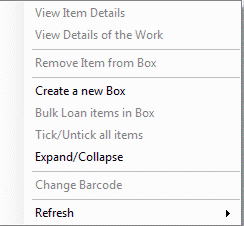
A pop-up menu may be invoked anywhere within a box or its items – the options available are context sensitive:
| Option | Notes |
|---|---|
| View item details | Allows a link to the Item details screen for the selected item |
| View details of the Work | This option is enabled when the item’s bibliographic id is highlighted and allows a link to Details of a work |
| Move item to Work | This option is only available in ‘Your items’ and allows the item to be moved between bibliographic records – see Transferring an item |
| Remove item from box | Allows the selected item to be cleared from the box display, e.g. when work on the item is complete. It does not delete the item. |
| Create a new box | Starts the dialogue for creation of a new box |
| Remove box (items not deleted) | Allows the selected box to be cleared from the display, e.g. when work on the box and its items is complete. It does not delete the associated items. |
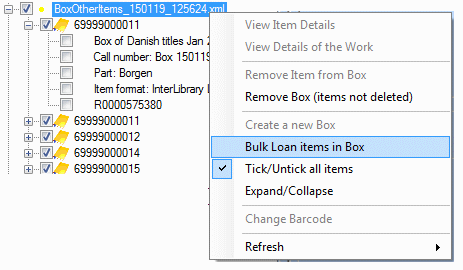
| Bulk loan items in box | If ALL of the contents of a box are to be loaned to a user, then this can be achieved by identifying the user in the Loans screen and selecting the items to be loaned. This will then enable the Bulk loan option |
| Tick/untick all items | This is enabled when the Item Selection checkbox above the tree display is selected, and allows all item checkboxes to be selected or deselected in one pass. |
| Expand/collapse | Provides a menu option to expand or collapse nodes on the tree display. This is an alternative to the + and – elements in the tree display. |
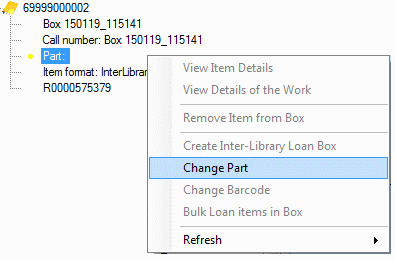
| Change part | Allows entry of a title identifier as the part, if individual title details are required; select the appropriate item and click the ‘Part’ row and then right-click to invoke this menu: this option is then enabled for adding title details. |
| Change barcode | This is available on newly created box items only. The item format parameters allow for the automatic allocation of a barcode when the items are created. If the item has a barcode already, this may be used, and this option provides a means to do that. If the barcode number is recorded in your database, you will be warned, as duplicates may not exist. [Note that the Item format parameters must be set with the ‘No Holdings’ checkbox ticked.] |
| Refresh | This options has two further sub-options: Item details and Boxes. These can be invoked where additional changes are being applied to the items using Cataloguing processes. |
Functions #
Transferring an item #
When an item is to be transferred between bibliographic records, this is achieved by first identifying the source record in Search. In the items display, select the item and a right mouse click will bring up the pop-up menu with an option to drop the selected item into your box of items:
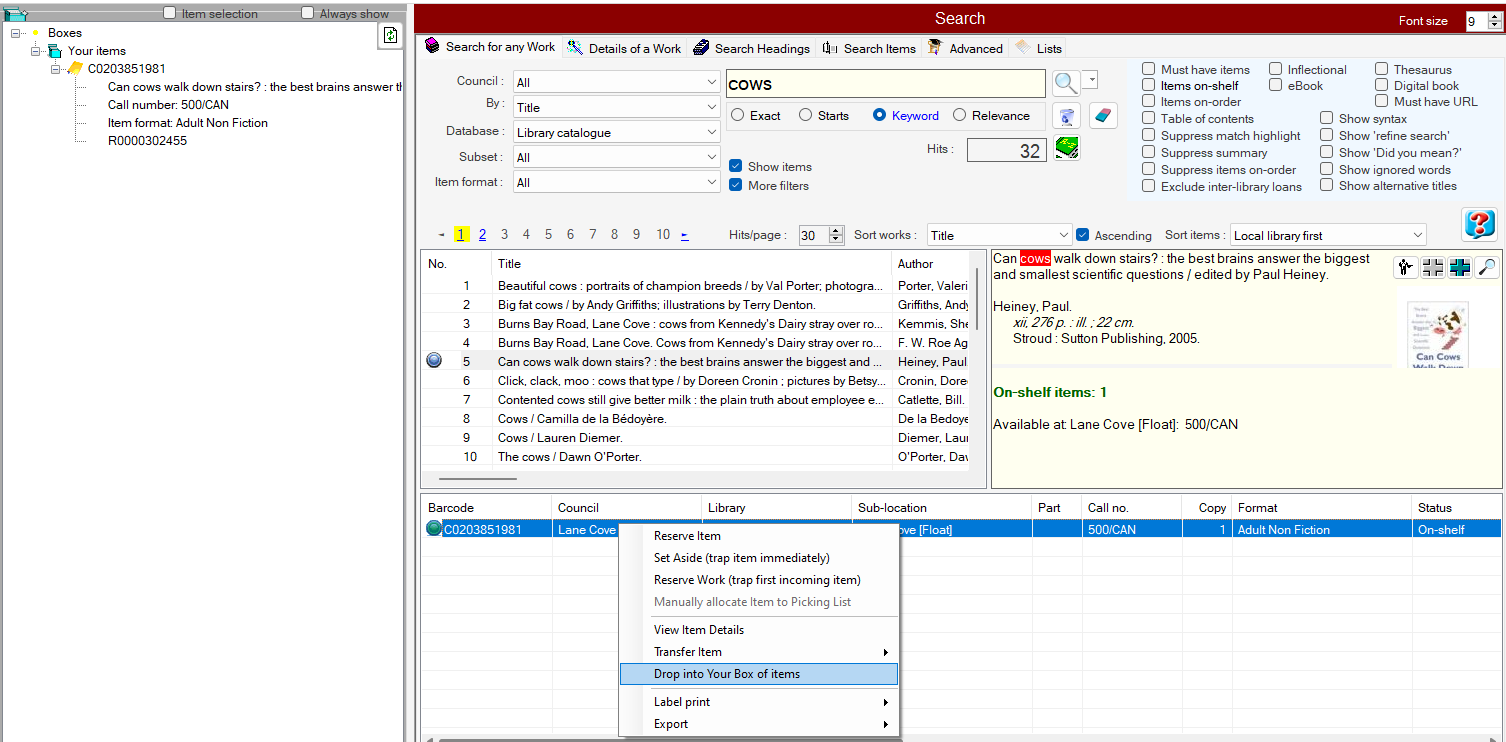
With the ‘Box of Items’ checkbox ticked, the items in your box can then be displayed: and right-clicking the item brings up the item menu. In this case, the option to be selected is ‘Move item to work’. This will then show the selected target title, as verification:
When the target title is clicked, the item is removed from the source and added to the target. The bibliographic record and all associated links are updated. [Note that if the summary is showing, and indicates ‘n of m’ items, this will not be updated until the search is refreshed.]
Creating a new box #
Creating a box may be useful for the library where a simple grouping of items is requested, e.g. an ILL box from State Library, such as a box of foreign language material. The options allow for the creation of a single bibliographic record to be known as the box (described as required by the library), with individual items able to be loaned and controlled using a defined set of barcodes (optional) assigned automatically by the addition process. Each item can be given a basic title as ‘Part’ if required, or this may be left blank.
- NOTE: a special item format parameter is required for the box, which optionally includes the range for auto allocation of barcodes. Please see Item Format parameters for details of this. The assigned barcode may be overwritten if the item already has a valid barcode. Parameter settings also allow the items to be suppressed from OPAC.
Multiple boxes can be created.
Steps #
1. Select the pop-up menu option ‘Create Inter-Library loan box’. Aurora will then offer a default box name, effectively using the current date and time. You can accept this with OK, or overwrite the default name as required, e.g. ‘Box of Danish books Jan 2015’:

Note that the xml file created will retain the default naming.
This xml file is held in a file on your Windows Desktop, e.g. – C:\Users\<yourID>\Desktop\Boxes
If you encounter any difficulty with creating the XML file, please refer to your local network manager, as there may be an issue with permissions, and you may need to be enabled to write to the local folder.
2. Aurora will then ask how many items to create in the box. The idea here is that the items are gathered and can be dealt with in one pass. Enter the number here and the items will be created; additional items may be created later, but this will need to be performed in Cataloguing.
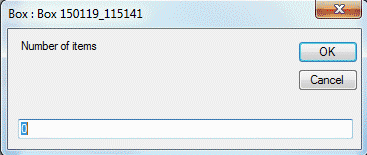
3. The box and items are not yet created – this step allows you to review and confirm:
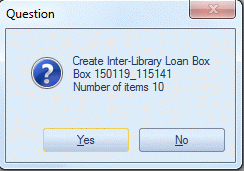
4. Aurora now creates the box and items and displays these in the Box of items panel:
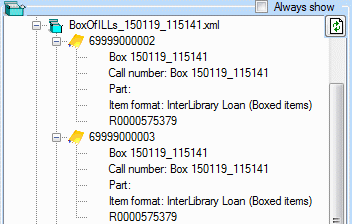
5. Optionally, if individual title details are required, select the appropriate item and click the Part row and then right-click to invoke the menu. The option ‘Change Part’ is now enabled and allows entry of identifying title details:
Bulk loan #
It is also possible to loan all items in a box – or a selection of them – in bulk to a user.
Steps #
1. The box and all associated items must be created, and any part details and other changes addressed
2. Make sure the ‘Always show’ checkbox is ticked
3. Identify the user loaning the material through normal search or barcode reading methods into the Loan screen
4. Tick the Item selection checkbox above the box tree display
5. On the pop-up menu, select Tick/Untick all items to apply ticks to all items in the box
6. If all items are to be loaned, then skip this step; however, if the loan is for a selection, remove the ticks for the items not to be loaned
7. On the pop-up menu, the Bulk Loan option is now enabled. Select this and the items will be loaned sequentially to the user – subject to standard checks for validity of the user and the items.
