How to – Delete withdrawn items. #
As part of weeding and day to day operations many libraries identify items that they wish to remove from their collection.
One of the methods to track this process is to
- Apply an item status of ‘Withdrawn’ to each item in Item Detail
- Process the item physically as per each libraries procedures, e.g remove Library barcode etc
- Delete the Item record from the catalogue using Item Transfer / Delete
Applying an Item status. #
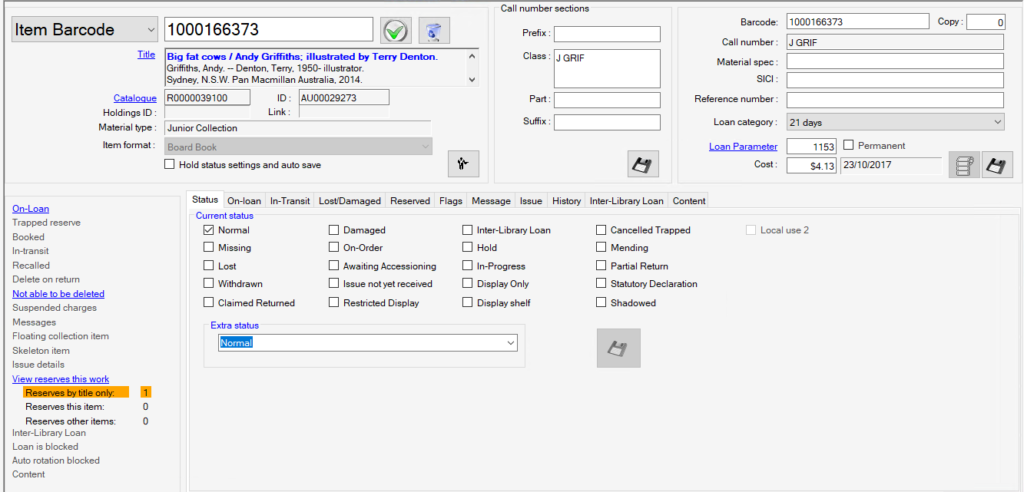
A item status of withdrawn can be applied individually in Item Details
- Open Item details for the specific item
- Tick the withdrawn tickbox on the status tab
- Click the save icon below the status tick boxes
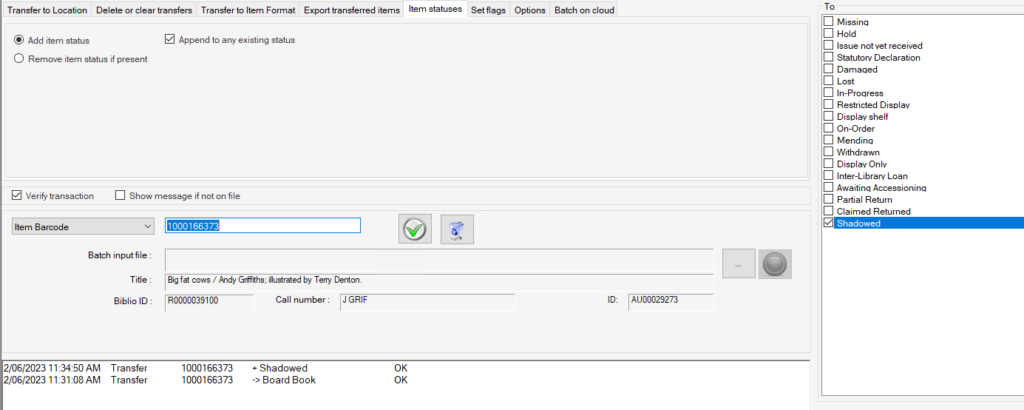
An item status can be added to multiple items using Item Transfers / Item status tab.
- Open Item Transfer and select the Item Status tab
- Select the Add Item status Boolean on the top left of the screen
- Optionally choose to tick “append to any existing status” or untick
- Select the Withdrawn tick box from the list of statuses on the right hand side of the screen.
- Optionally choose to tick “Verify transactions” or “show message if not on file”
- Select the item identifier to process the item transfer e.g. Item barcode or Aurora Item ID
Add item status to each item individually
- Insert the item identifier into the input box
- Click the green button
 to run the transfer to Item status
 - A message log will appear in the input below listing the item and the transfer that took place e.g. +Withdrawn.
Add item status to multiple items
- Create a list of item barcode or Auroura Item ID within a .txt file with each identifier separated by a enter and each underneath the other.
- Click on the
 Three dot button to open file explorer, Navigate to and select the .txt file of items.
 - Click the green button
 to run the transfer to Item status
each item will be processed and displayed in the log below.
Deleting items with withdrawn item status (page information) #
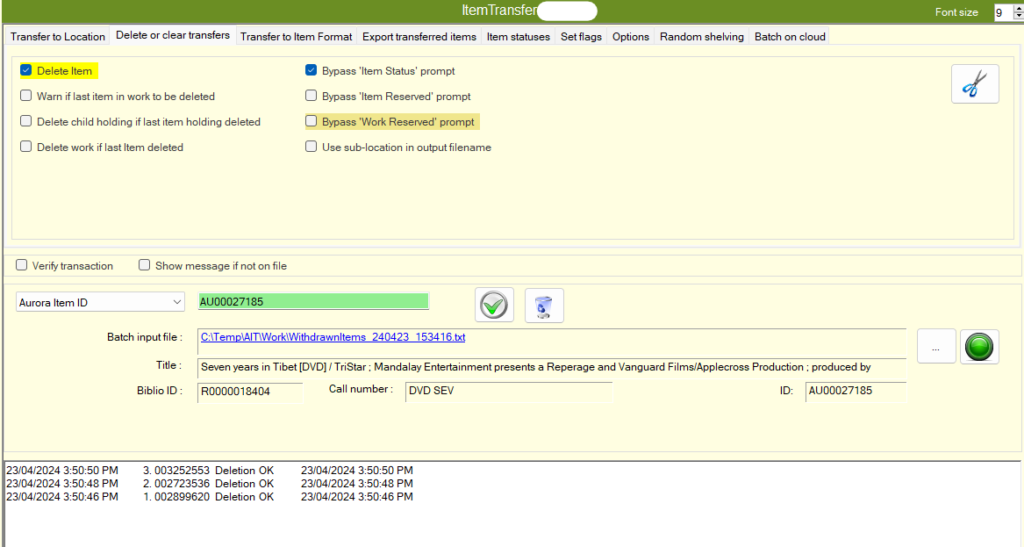
On the circulation ribbon select the Item Transfer Module and then select the ‘Delete or clear Transfers” tab.
A range of tick boxes are available for item deletion process.
Choose the Tick boxes according to the libraries individual setting.
| Checkbox | Notes |
|---|---|
| Delete item | If unticked – Clears location for a temporary transfer. If ticked – Deletes the Item. |
| Warn if last item in work to be deleted | This option is valuable, particularly if the ‘Delete work on last item deletion’ checkbox is not selected and alerts the user to the fact that the item being considered is the last item attached to a specific title. If this is indeed the case, the operator is given a message to proceed. |
| Delete Child Holding if last item Holding deleted | Where the library uses separated child holdings rather than embedded holdings, then this option may be employed to allow for the automatic removal of the holdings record when the last item is removed. [**Note that the holdings record will be removed, but even if this represents the last item in a bibliographic record, the parent bibliographic record is not removed by this action.] |
| Delete work if last item deleted | If checked, this allows the deletion of the last item attached to a work to trigger the deletion of the parent bibliographic work. |
| Bypass ‘Item Status’ prompt | if selected this allows any item status information such as indications of Missing or Lost to be disregarded, and the transfer to proceed regardless. Note that ‘Withdrawn’ status is handled as below, and this checkbox does not then reflect that status. |
| Bypass ‘Item Reserved’ prompt | if this is selected, any information on the item’s reservation is disregarded; otherwise, a prompt will be provided indicating reservation activity. |
| Bypass ‘Work Reserved’ prompt | if this is selected, any information on the works reservation is disregarded; otherwise, a prompt will be provided indicating reservation activity. |
| Use sub-location in output filename | this checkbox is specifically applied for use in Queensland Public Library Service exchanges – and in particular where councils have merged. PLS records refer to the original council name, which is preserved in the sub-location name. Selecting this checkbox therefore allows the subsequent file to be created using the old council name, e.g. TransferDeletion_Injune.ait, rather than the new identity, which would be TransferDeletion_QMRC.ait – but it would not then distinguish Inune material from that of Roma, Mitchell, etc. |
Create a list of items with Item status “withdrawn” and run item deletion #
There are multiple methods for creating lists of items that have withdrawn status including, RK096 item status – multiple, or creating them manually by scanning barcode.
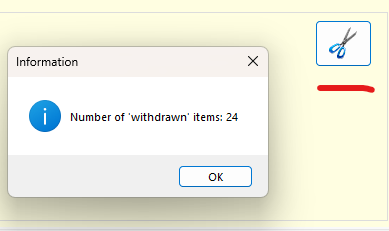
Item transfer also has a method of doing this with the “Create batch file of withdrawn Item” ![]() allows creation of a file of withdrawn items.
allows creation of a file of withdrawn items.
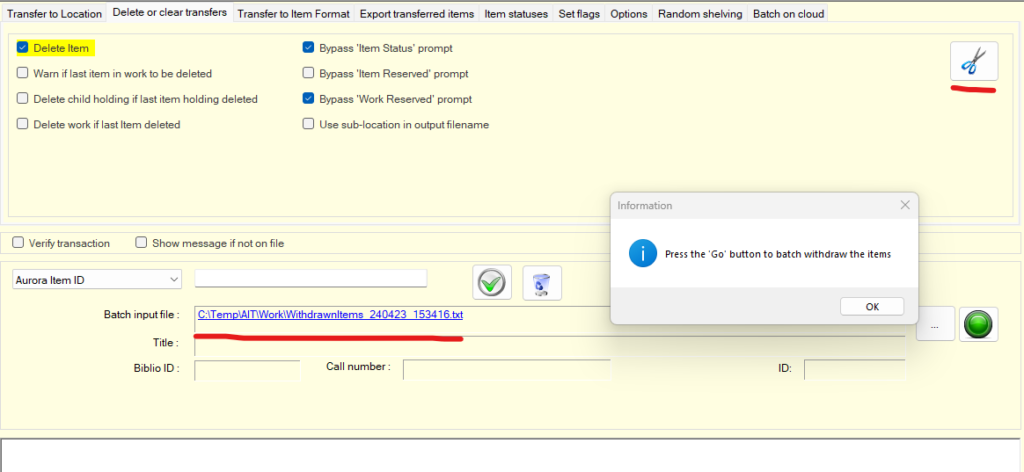
Steps
- Click the
 “Create batch file of withdrawn Item” button
 - A pop up will appear listing the number of items with the status of withdrawn – Click ok
- a second popup will appear with a message stating “Press the go button to batch withdraw the items – click ok
- The batch input file box will display a path to a .txt file that has been created.
- Confirm the Delete setting on the tick boxes at the top of the screen are correct
- Click the green button
 to run the transfer to Item status, each item will be processed and displayed in the log below.
