Aurora Label #
Aurora Label provides functions to produce a user membership card, complete with user barcode, allowing for convenient workflow when associated with self-registration. The function is called from Desktop / User Details, allowing in turn review of the user’s details and application, and permitting the creation of the membership card direct from the user details display.
This section describes the Label module itself and the setup elements.
User Membership card #
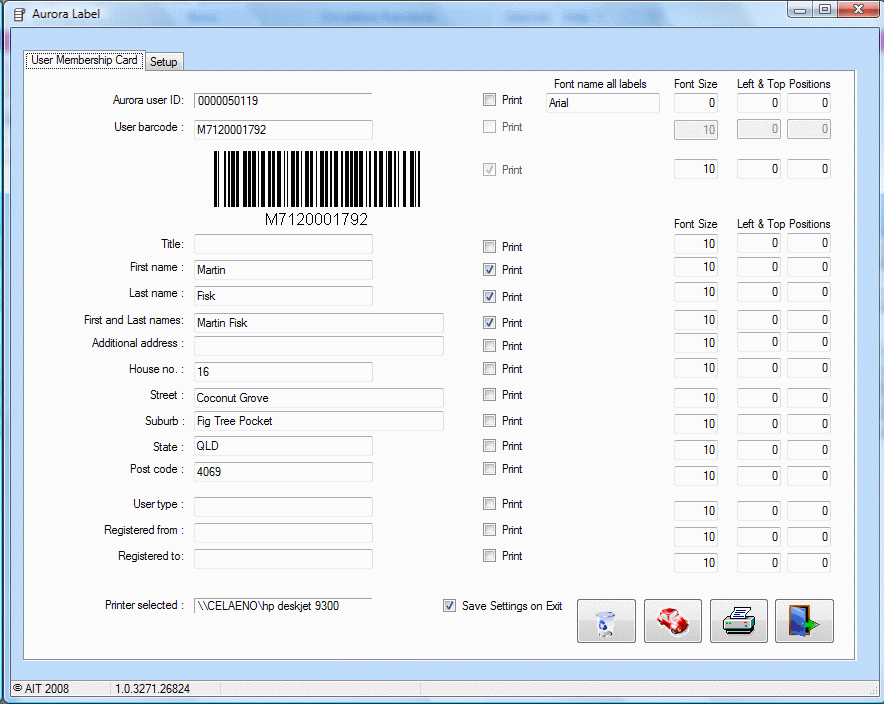
Initially, this tab will show the data elements that may be used in production of the card in a detailed form:
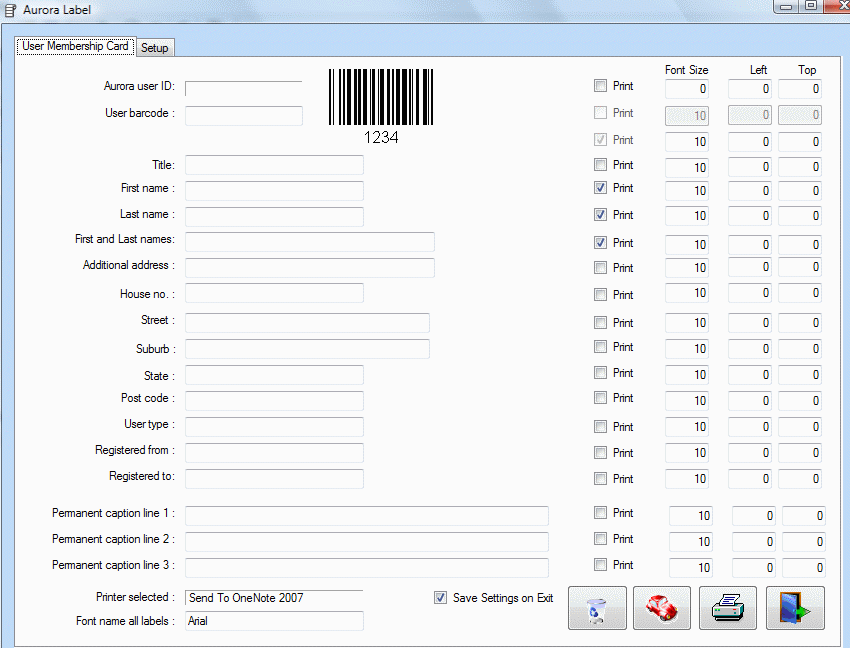
The form may include the following data elements, each of which may be included on the membership card:
- Aurora User
- ID
- User barcode
- Title
- First name
- Last name
- First and last names [provided to allow better handling of the compound name]
- Additional address
- House no.
- Street
- Suburb
- State
- Post code
- User type
- Registered from
- Registered to
- Permanent caption lines
Three library definable lines are then allowed for entry of free text, e.g. to provide address or contact information for the library. These details are constant on all labels.
Each element is controlled by a checkbox, which determines if it is to be used in the printed output, and if required in which size font, then also by a set of coordinates, allowing placement on the label according to left and top positions by pixel count. Some experimentation will be required to ensure that the correct placement is determined.
Additional controls #
Font #
The font to be used in the card output is entered directly in the text box at the top of the User Membership Card tab. Care should be taken to ensure that all workstations using the module are equipped with the font, and that its name is spelt correctly.
Printer #
The printer to be used for the card production is set in the Setup tab, and details displayed at the foot of the User Membership Card tab.
Save Settings on Exit #
When initially setting the card details and coordinates, the required settings can be saved on exiting by using this checkbox. Systems managers should take note of the required final settings in case these are changed by adhoc activity.
#
Four control buttons are provided:
 Allows the currently displayed details to be cleared for entry of a new user details or test operation
 This button allows a test operation to be carried out.
 Allows print output via a preview display.
 Exits the module
Test operation #
If the test drive button is clicked, this will populate the form with some test details, allowing the data elements to be manipulated and controlled for output [Note that permanent caption coordinates are cleared by this option]:
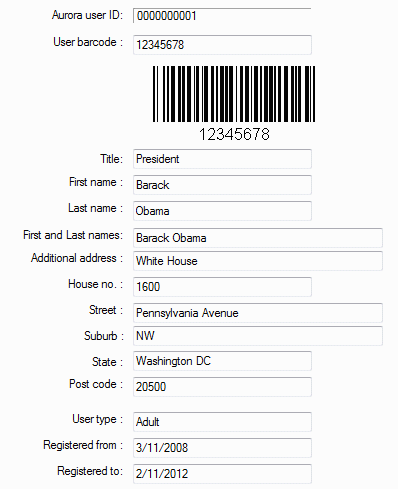
Any permanent lines should be added after the main layout is determined, e.g.:

Printing the card #
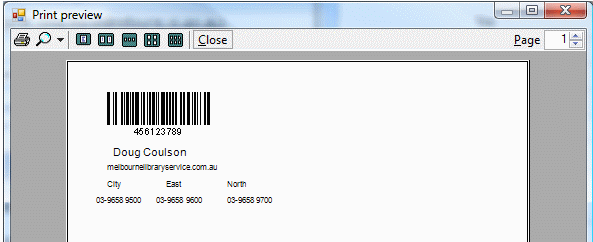
Clicking the printer button invokes a print preview, allowing the output view to be shown and resized. This is a standard Microsoft Windows print preview display and allows the card to be printed directly.
Setup #
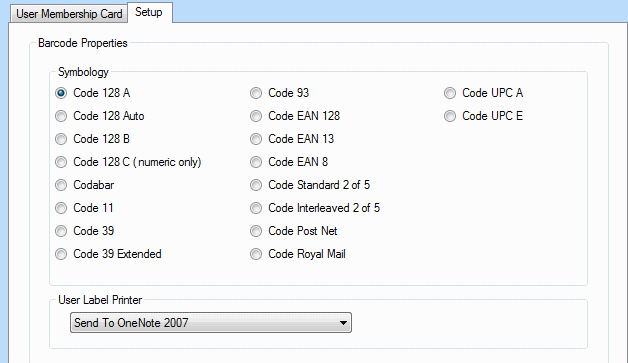
The Setup tab holds two separate panels:
-
- Barcode properties
- User label printer
Barcode properties #
This panel lists all the barcode symbologies that are supported in the printing of a barcode. Aurora does not mandate any specific symbology, and system managers should check local equipment for details of the symbology used by their readers. In all cases, print output should be tested to ensure that it reads correctly.
User label printer #
This combo allows definition – for the current workstation – of the default printer for card production.
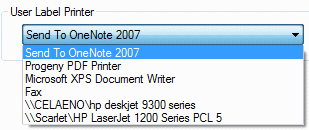
Note that on selection, the printer’s name is shown on the User Membership card tab. If no explicit selection, the first printer listed is used by default.
Printing a User Card #
When the User Card button is clicked, then a simple overlay window will appear, containing the details of the user that is currently selected, and allowing the details to be sent to the printer:
The process uses a separate program – Aurora Label – described below. Please contact AIT for details on acquiring the module.
