Reserves Reports  #
#
Reserve reports have been combined in the Reserves function within the Reports & statistics Tab od Desktop.
All Reserves Tab #
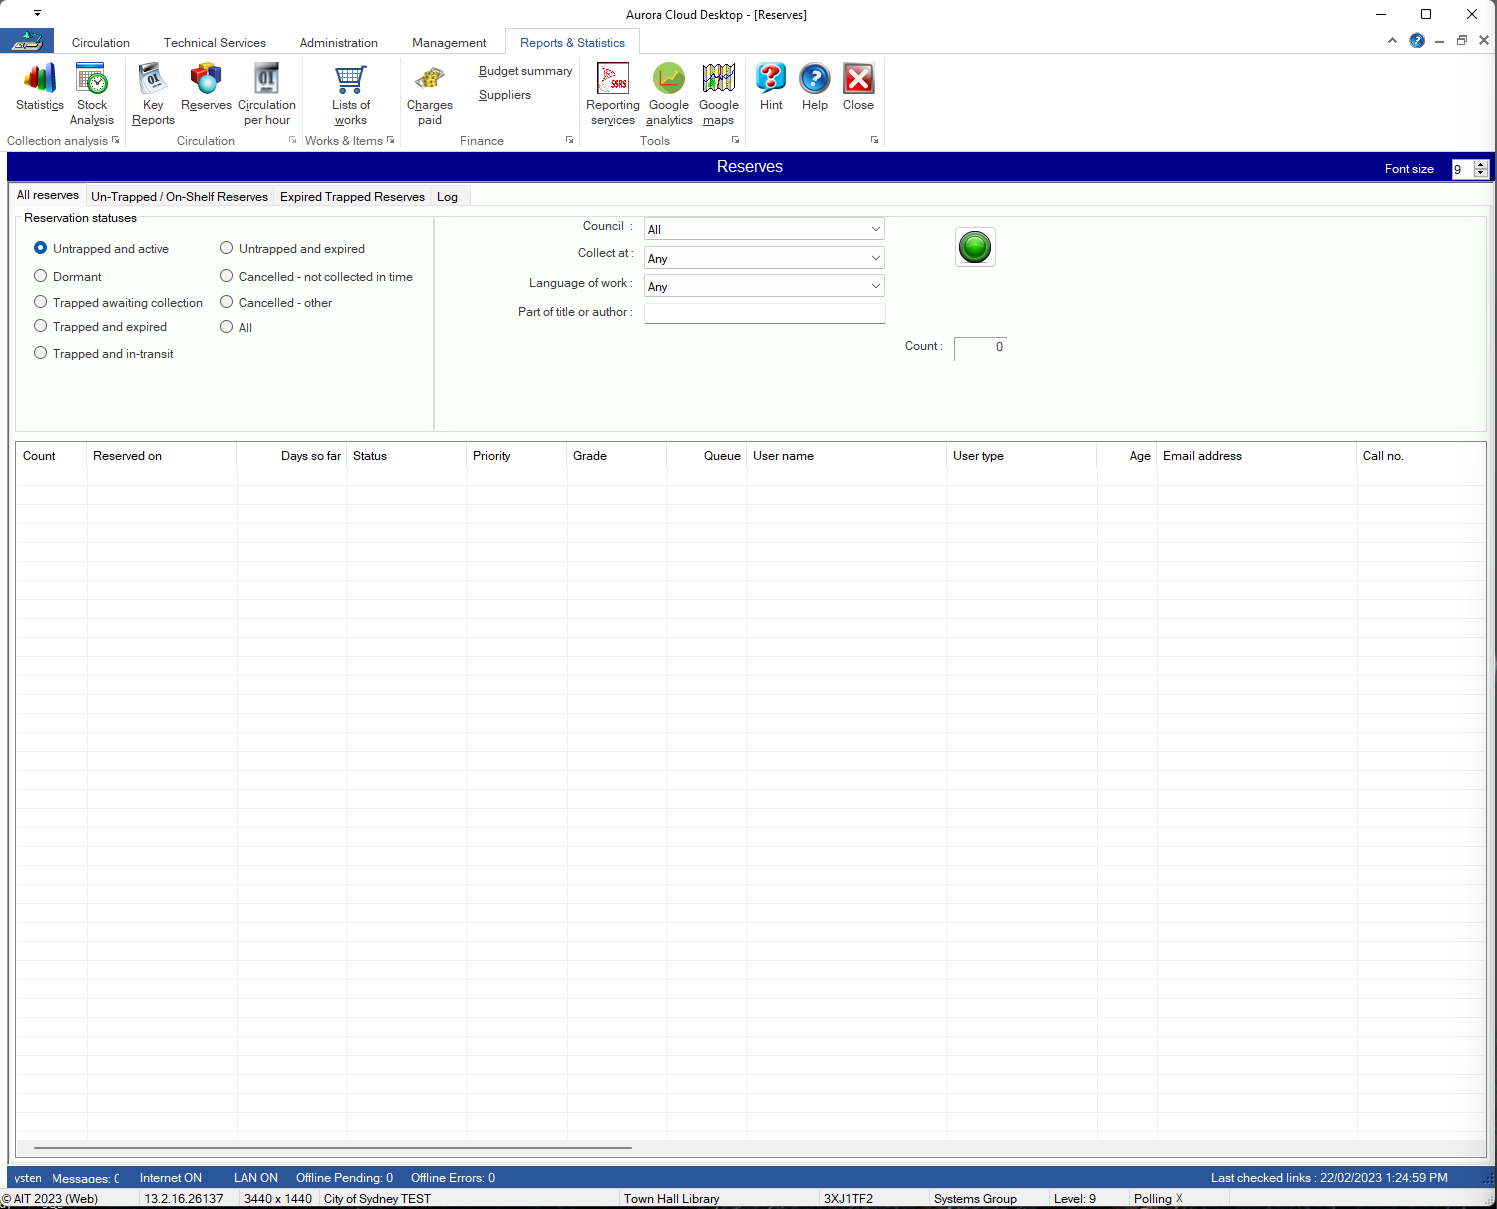
Allows searching for items on reserve with specific statuses and collect at location of the reservation
Reservation Statuses
- Untrapped and active – Lists the active reserves that have not yet been trapped.
Note this list could include works with no items, works with items on loan, works with items with abnormal status etc - Dormant
- Trapped and awaiting collection – List the active reserves that are trapped and on the reservation shelf and have not past their pick up expiry date
- Trapped and Expired
- Trapped and in-transit – List the active reserves that are trapped and are in-transit to the collect at location
- Untrapped and expired
- Cancelled – Not collected in time
- Cancelled – other
- All
Additional filters allow
- Council – the entity of the collect at location of the reserve
- Collect at – The specific collect at location of the reserve
- Language of work
- Part of title or author – allows search term to filter the reserves.
Command icons
 Starts the process to create the report. While the report is building, the green light will change to red, and this may be used to interrupt the process.

Un-trapped / On-shelf Reserves #
Un-trapped / On-shelf Reserves report allows the library to list and identify reserved material which is indicated as being on shelf and available – that is, it has no abnormal status indication. This is a report which should be run regularly, as it will be the only means of identifying material reserved via WebOPAC.
Options are provided to allow selection of location where items are currently located, selection of display elements, and control output.
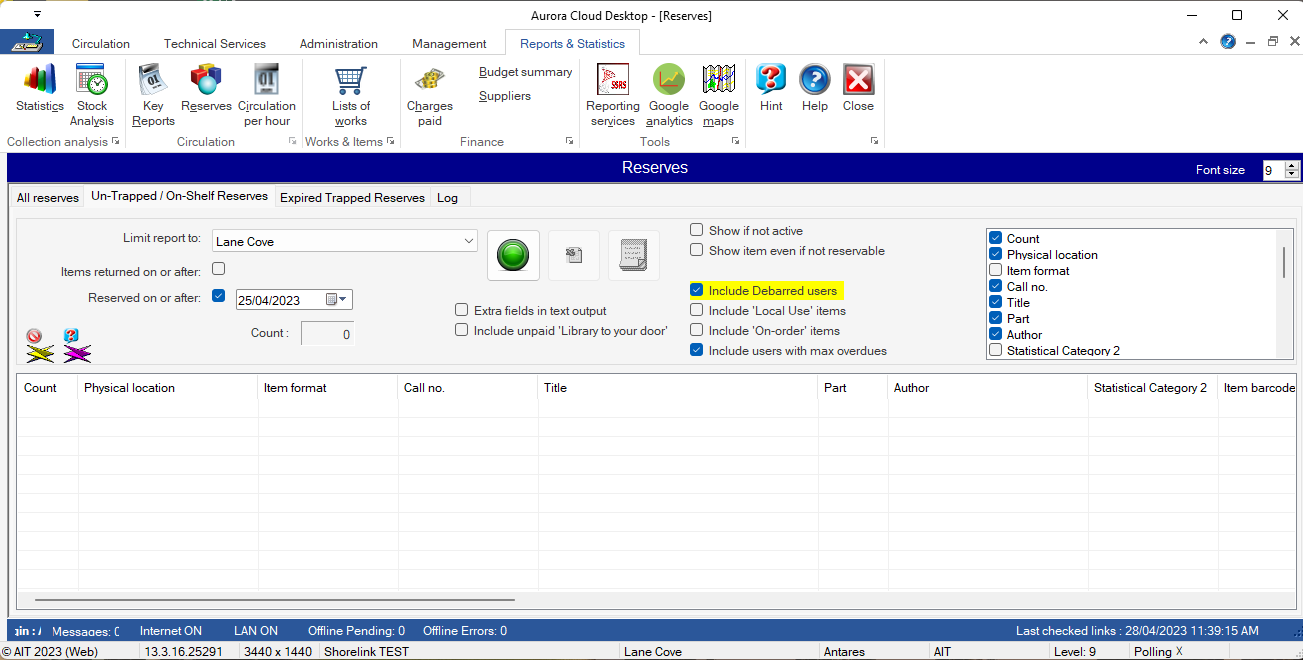
The base screen appears so:

Control panel #
The Control panel contains all of the options required to run the report:
Location – The Limit to drop down allows the selection. Note that this is the location where the items are expected to be found, not the ‘collect at’ location. The locations presented will be the branches defined in library parameters, and the default will be the location associated with the current operator’s workstation.
Date controls
Two date controls are available, to limit reporting to:
- Items returned on or after [a given date]
- Reserved on or after [a given date]
where if a specific date is to be used, the checkbox may be ticked and the date selected using the calendar tool.
Command icons
 Starts the process to create the report. While the report is building, the green light will change to red, and this may be used to interrupt the process.
 Allows the report to be exported to Excel. Note that this icon is greyed until the report is run; then the Excel file link is enabled.
 Allows the report to be exported to a text file. Note that this icon is greyed until the report is run; then the Export file link is enabled
Check Boxes
- Show if not active – allowing reserves to be shown if they are not active.
- Show item even if not reservable
- Include debarred users
- include ‘Local use’ items
- Include ‘On-order’ items
- Include users with max overdue
- Extra Fields in text outputs
- Include unpaid ‘Library to your Door’
Display controls
At the right of the command panel, a set of checkboxes is found – this controls the results display: if ticked, then the element is displayed, else not. The checkbox is dynamic – ticking an element will immediately add that column to the display.
The following columns are available for display:
| Count | Physical location | Item format | Genre |
| Call no. | Title | Part | Item barcode |
| Collect at | Home Library | Reserved on | Not wanted after |
| User barcode | User name | Date last seen | BibUSRI |
| Reserve ID |
Note that the Date last seen is given, allowing an early judgment on whether the item is actually ‘missing’ and should be given that status. To allow the process to operate more efficiently, the library can set an Enterprise parameter, setting the item status automatically to Missing if the item appears on this listing more than the library defined number of times.
Results #
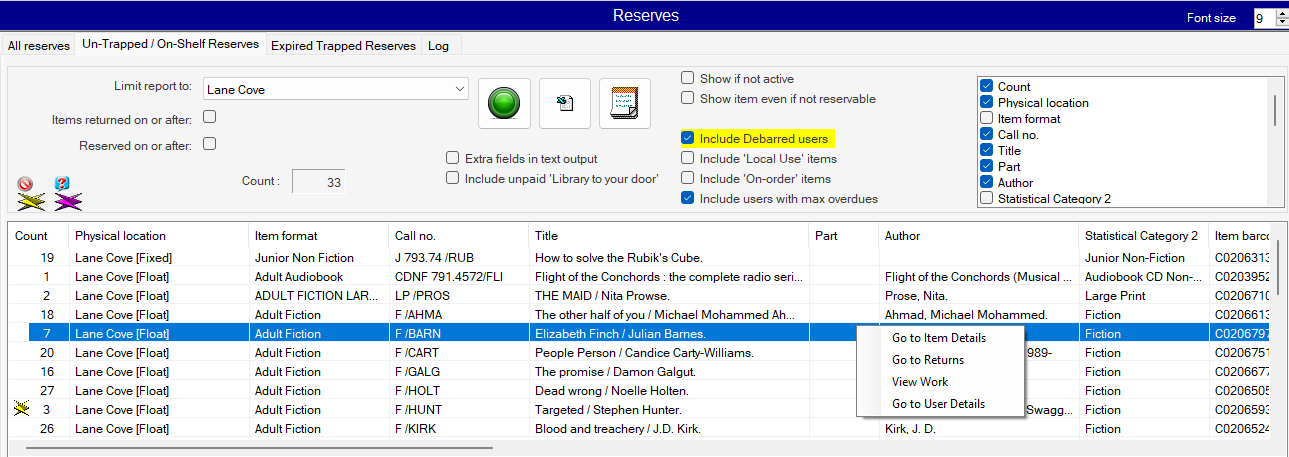
When the listing is complete, the icons will all be available for selection, and a count of the overall number of reservations listed is given:
The actual details are then presented:

Note that all of the columns defined in Display controls may be switched on or off by changing the nature of the tick in the checkbox. The display may be sorted (ascending or descending) by clicking on any column header – a second click will reverse the sort order.
#
A simple pop-up menu is available on each item in the listing, allowing a link to
- ash indicates that the item has now appeared for the number of times set by the library before it is automatically set with status ‘Missing’
Flashes #
There are two item specific flashes which may be linked to an item in the results list:
 This indicates that although the item is appearing on the list, the specific item does not match with a permitted reservation parameter. In such a case, parameters should be checked, and another item for the title supplied if appropriate.
 This flash indicates that the item has now appeared for the number of times set by the library before it is automatically set with status ‘Missing’
Expired Trapped Reserves #
The Expired trapped reserves report provides flexible options for listing reservations which have not been collected and includes capability for including cancelled reserves too. Options include the ability o focus on a specific location, to control the output details and to determine what is included in the listing.
Screen elements #
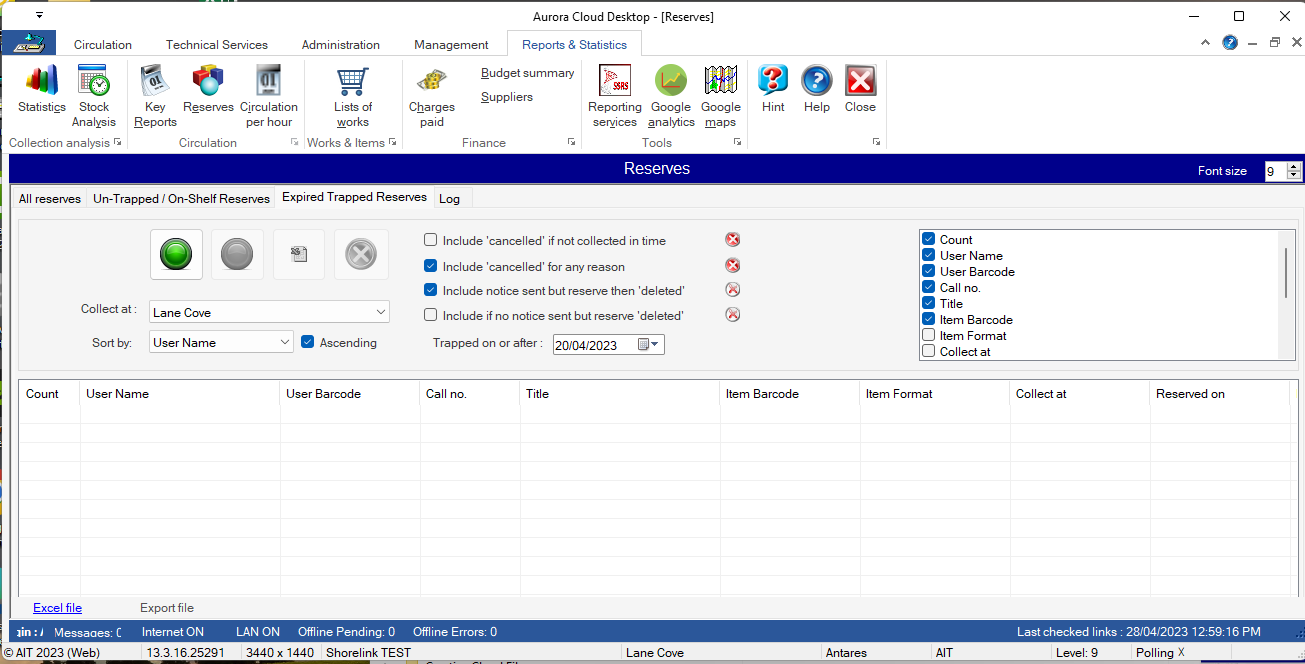
The base form looks like this:

Control panel #
The Control panel contains all of the options required to run the report:
Command icons
4 command icons are presented:
 Starts the process to create the report.
 Interrupts the report creation. Note that this icon is greyed until the report or Excel output is run.
 Allows the report to be exported to Excel. Note that this icon is greyed until the report is run. On completion, the report is written to Aurora Work as Expired_Trapped_Reserves_<date>_<WorkstationName>.xls, and a message giving the exact filename is given to the operator. The operator may immediately open the Excel output as an option to the message question – and the file is also linked in the Export link at the foot of the screen.
 This button allows the operator to cancel any reserves which have gone past their date for collection (as long as a notice has been sent). The icon is not enabled until an Excel output has been performed; this allows a measure of security in ensuring that a record of the reservation exists before this action.
Location
A combo selection allows the location (branch) to be selected for the listing. Note that this is the location where the items are expected to be collected from. The locations presented will be the branches defined in library parameters, and the default will be the location associated with the current operator’s workstation.
Options
Right of the command icons, four checkboxes allow for specific inclusions into the Expired Trapped Reserve report:
These checkboxes allow for listing where:
- Include ‘cancelled’ if not collected in time
- Include ‘cancelled’ for any reason
- Include notice sent but reserve then deleted [Note that this may occur where the user receives notification and cancels the reserve via WebOPAC
- Include if no notice sent but reserve deleted
and underneath the checkboxes, a date control allows specification of a start date for the trap to have taken place.
Sort by
At the bottom of the control panel, a small combo allows selection of the required sort option, The two options are by:
- User name
- Call no.
and the selection depends on how the reserves for collection are arranged in your library.
Display controls
At the right of the command panel, a set of checkboxes is found – this controls the results display: if ticked, then the element is displayed, else not. The checkbox is dynamic – ticking an element will immediately add that column to the display.
The following columns are available for display:
| Count | User name | User barcode | Call no. |
| Title | Item barcode | Item format | Collect at |
| Home Library | Reserved on | Date trapped | Notice sent |
| Pickup Expiry | BibUSRI | ReserveID |
Listing example #
An example listing then would look like this:

Note the links at the foot of the screen: to an Excel file or an Export (text) file. When the Excel or Export buttons are invoked, then the appropriate file is created, and these links will become enabled – in the image, Excel is enabled and Export disabled. Clicking on the link when it is enabled will open the appropriate Export file.
