Headings  #
#
The Headings options allow retrieval and examination of records from the point of view of their headings, using both search and browse capability. Please note the centre bar can be used to move left and right, to give more screen to the current task.
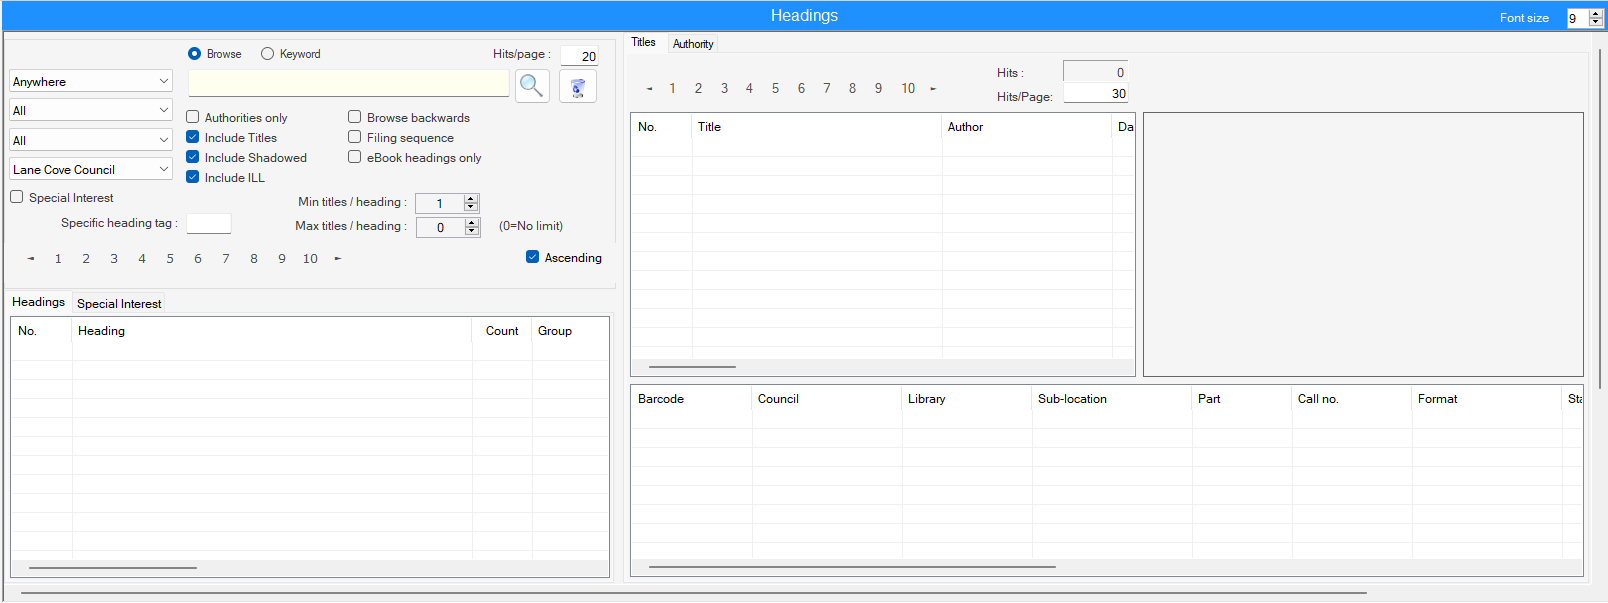
When selected, the screen will be similar to this:
Searching #
The Headings search screen then consists of a control panel and results display:
Control panel #
The control panel provides all that is needed to generate a search or browse of the headings:
Radio Buttons #
- Browse This option allows you to list all headings starting with your string, and I a good way to look at names in a directory style listing.
- Keyword Your search string may be anywhere in the record, so ‘Brian’ can be used to search names with forename or surname Brian; or ‘Green’ to search both names and subjects, or even company names all in the one search. Note that an asterisk (*) may be used as a truncation symbol.
Checkboxes #
- Authorities only. Your library may opt to create and maintain authority records to support the headings (typically Name, Title, Subject and Series) used in bibliographic records, but this is not essential. Indeed an authority record is only required if the heading has references (or in a subject heading, narrower, broader or related terms), or has supporting notes. As you will see, it is very straightforward to convert a simple heading to an authority record if required, and this checkbox provides a toggle mechanism to select only authority records for the selected keyword or ‘starts with’ string.
- Include titles. Each title in the bibliographic database creates a controlled heading; the vast majority of these however will not require an associated authority record. This option allows the titles to be shown or hidden.
- Include Shadowed –
- Include ILL –
- Browse backwards. When looking for a heading it is often useful to reverse the index to be able to look at preceding entries, particularly with respect to subject headings.
- Ebook Headings only –
- Special interest. Where the library is a Library for the Blind, or has a developed Homebound service, then Special Interest Codes (SICs) may be defined as broad subject headings. This option then restricts the display to these defined SIC headings.
Heading type #
A pull-down combo menu provides options for the type of heading to search:
- Anywhere – i.e. all headings [this is the default]
- Name
- Title
- Subject
- Series
Heading subtype #
Each heading type has a number of associated subtypes which may also be selected for fine-tuning. For example, here is the selection for Name:
The selections available for each heading type are:
- Anywhere
- all
- Name
- All
- Personal
- Corporate
- Conference
- Title
- All
- Main
- Alternative
- Variant
- Uniform
- Linking
- Subject
- All
- Topical
- Geographic
- Names
- Corporate
- Genre
- Titles
- Special interest codes
- Special interest headings
- Series
- All
Language #
A further combo menu allows selection of the language of the heading:
#
Two control buttons are provided:
![]() – This ‘onscreen return’ allows the simulation of a return key by mouse action.
– This ‘onscreen return’ allows the simulation of a return key by mouse action.
![]() – The wastepaper bin icon is used to clear the text box. Occasionally, this box may not be selectable by mouse, but clicking this icon will allow clearance, in readiness for entry of a new search string.
– The wastepaper bin icon is used to clear the text box. Occasionally, this box may not be selectable by mouse, but clicking this icon will allow clearance, in readiness for entry of a new search string.
Filters #
2 filters are also provided, allowing selection of headings to be conditional on minimum and maximum instances of titles per heading
Note (0=No Limt) – that for maximum instances the default of zero means that no limit is applied.
- Min Titles / Headings
- Max titles / heading
Please note also that the default Min titles per heading is set at one. This will then filter out tracings, as non-preferred terms (see references) will normally have zero titles attached, e.g.
If tracings are to be viewed, please reset the Min titles per heading value to zero, and they will be displayed:
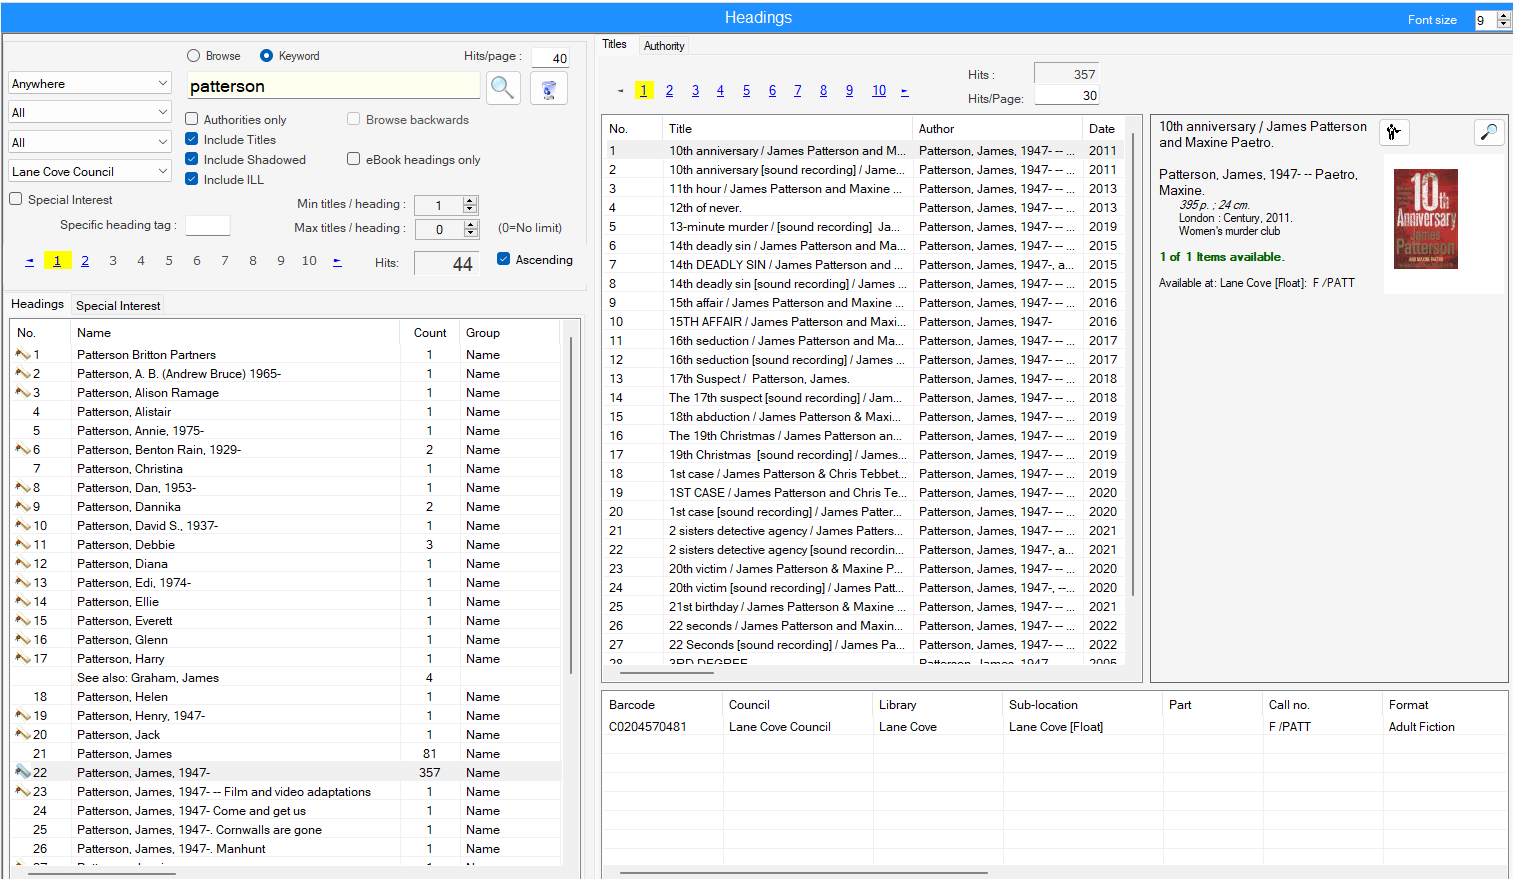
![]() – This symbol identifies a results row that is supported by an authority record.
– This symbol identifies a results row that is supported by an authority record.
Hits/page #
This controls the number of results to be displayed per page of results – up to a maximum of 99. The setting is persistent for the workstation, so if set in one session will be the same for the next session start.
Results #
NOTE that the main division between left and right panels can be moved right to expand the results display.
The matching headings are displayed in the lower panel. A page control is displayed at the top allowing paging forward and back.
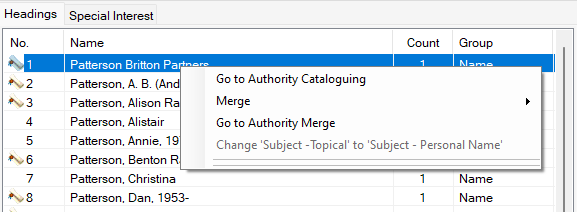
Pop-up menu #
Clicking a heading in the results screen will also bring up a small pop-up menu – that varies slightly according to context:
Right click pop up if the heading is not authorised
with options to upgrade the heading available
- Upgrade heading to full authority
- Upgrade heading to basic authority
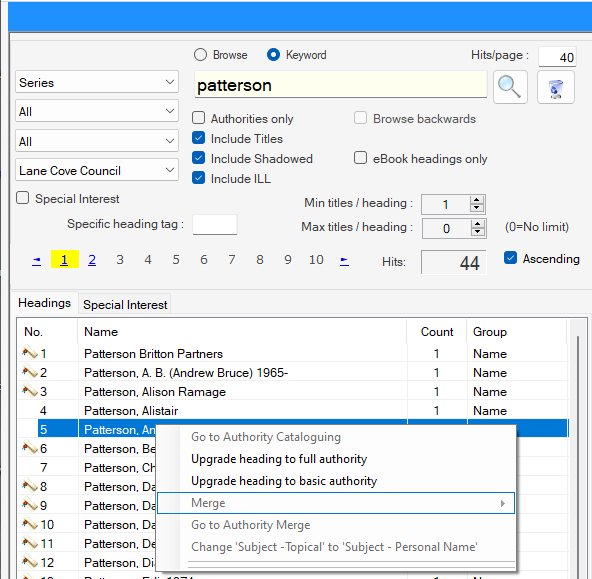
Right Click if the heading is Authorised
- Go to Authority cataloguing. This option allows a link to Authority Cataloguing, and is enabled only if there is a linked authority record for the heading.
- Merge – With two options
Merge from
Merge to - Upgrade Authority Merge.
Upgrade heading to full authority
When this option is selected from the pop-up menu, Aurora will ask for confirmation of the action, and will repeat the selected heading:
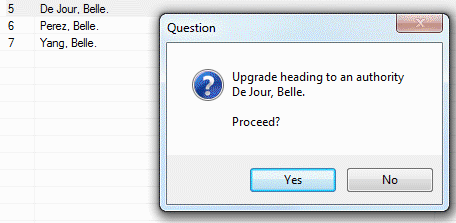
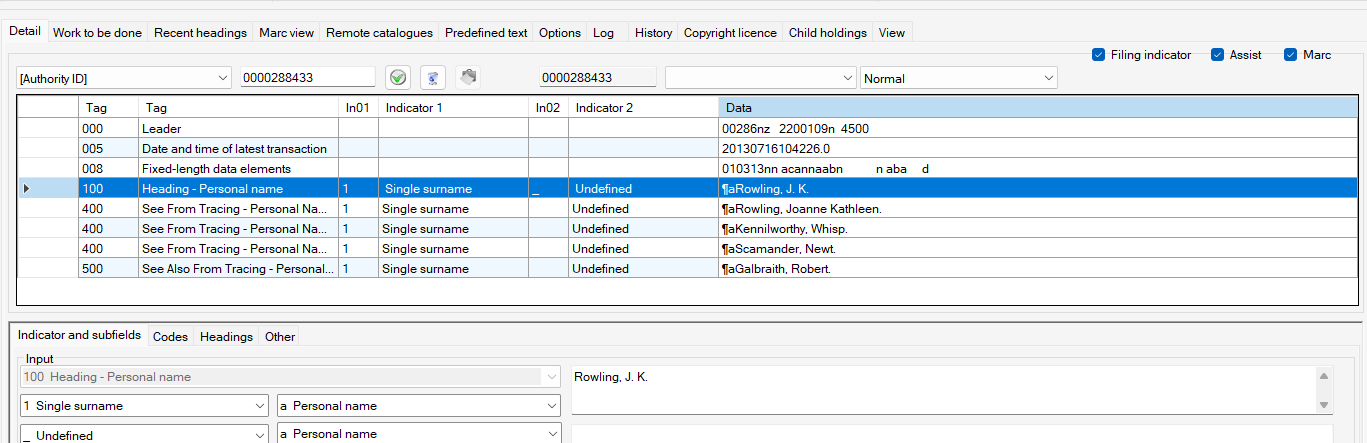
If you decide to follow the action and say Yes, then Aurora will automatically create (and save) an authority MARC record, translating the heading into the correct coding. The Authority Cataloguing form will be invoked, showing the new record in diagnostic format. Note that this record will only have the main heading defined (1XX) field) as there is nothing else to be converted from the heading. You can now freely edit the record, e.g. to add See or See Also references, or even as here to change the 100 heading to 400 and replace with a new main heading (where Robert Galbraith is a pseudonym):
#
With this option, the authority is created as above, but the Authority cataloguing element is bypassed, and the form not shown.
Associated records displays #
When a heading is selected in the Results display on the left, the right portion of the screen will then show associated bibliographic records, and if appropriate the associated authority record for that heading:
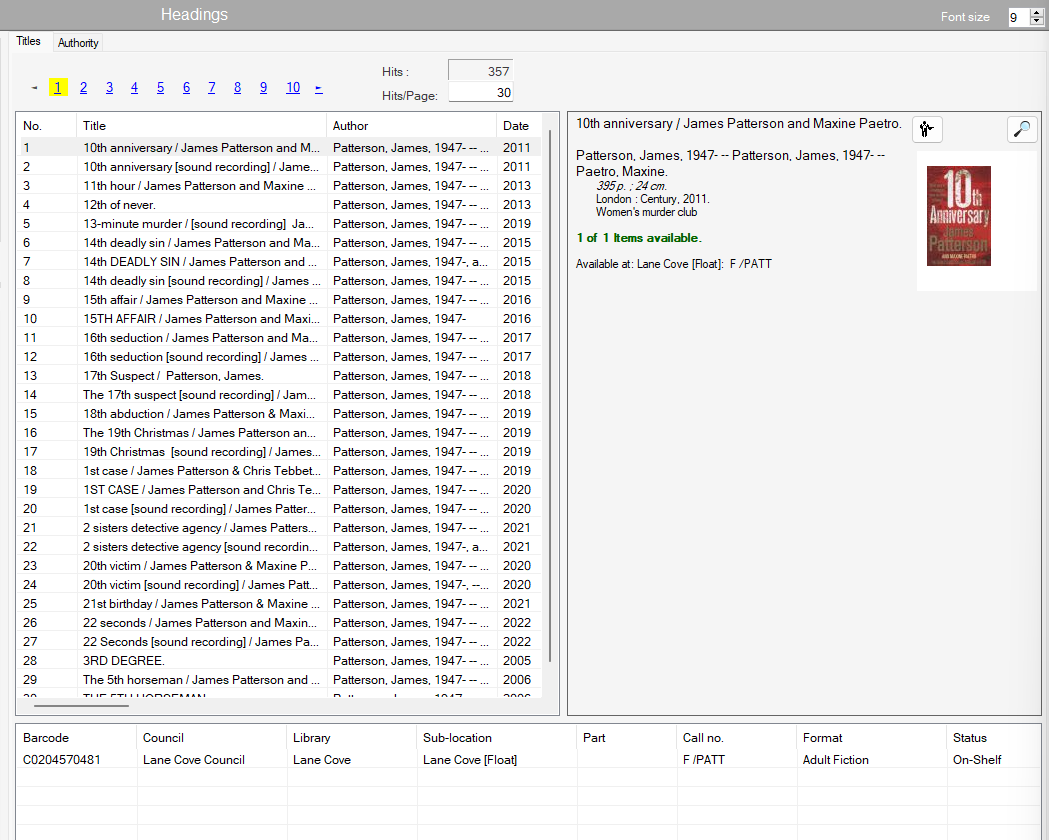
Titles Tab – List of works #
This lists all of the titles containing the selected heading.
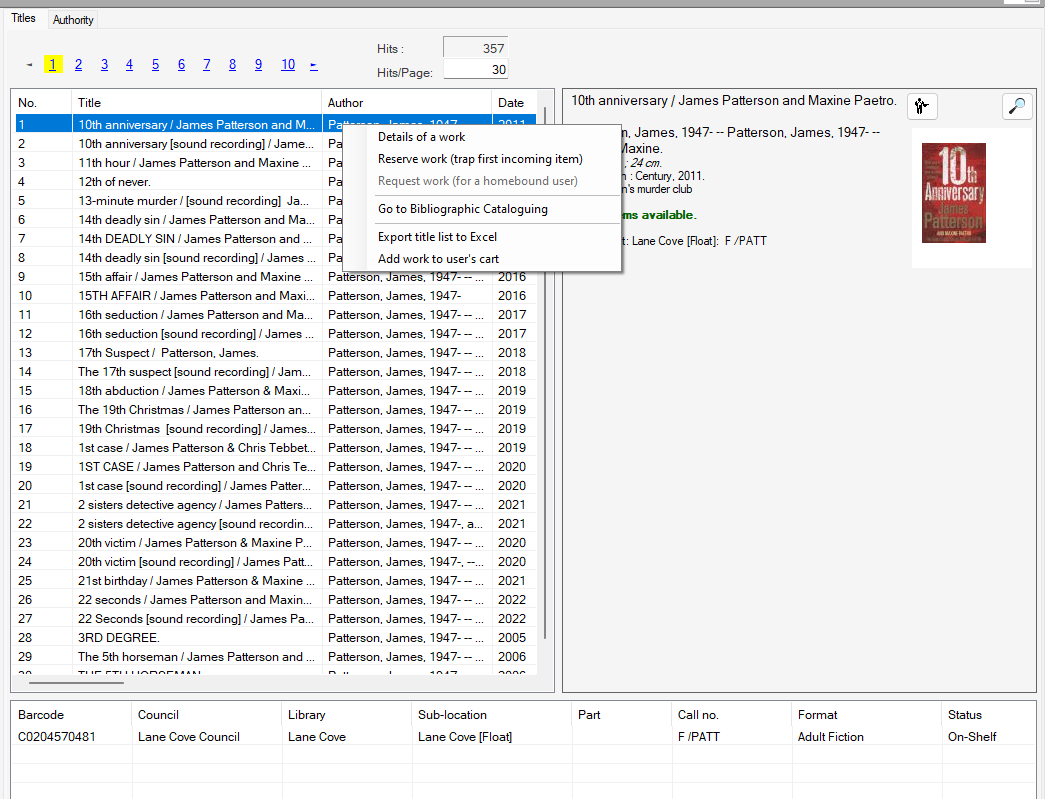
Clicking on a title will invoke a small pop-up menu:
The pop-up menu allows the following actions:
- Details of a work
- Reserve work (trap first incoming item)
- Request work (for a homebound user)
- Bibliographic Catalogue maintenance
- Export title list to Excel
- Add work to user’s cart
Titles Tab – Summary display #
As a title is selected, a summary is displayed to the right of the title’s details. If an image of the work’s cover is available, with basic item summary.
Button bar – The summary also contains a small button bar with two command buttons:
 Enables the operator to place a reserve on the work
 Magnifies the thumbnail of the cover image. If there is no thumbnail image, the magnification button is suppressed.
Titles Tab – Items display #

As a title is selected, the bottom panel will list the items for that title, showing barcode, location, call number, item format, loan status, and more:
A right-click on an item will invoke a small pop-up menu:
Authority Tab #
When a heading is supported by a MARC Authority record, that authority record can be viewed on the Authority tab.
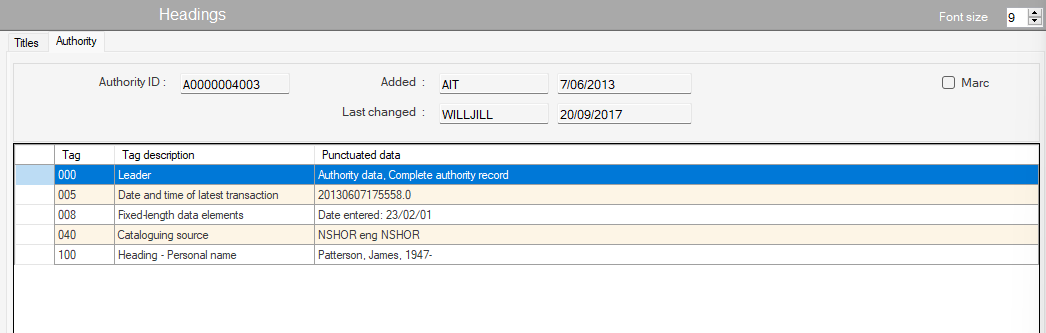
Header – The tab has a header displaying:
- Authority id. This is the internal record id for the authority.
- Added. Gives the operator id and date when the record was first added.
- Last changed. Gives the operator id and date, when the record was last modified.
- MARC checkbox – controls the display of the record. If unticked (default) this will show in labelled display; if ticked, in MARC diagnostic format: Note that these displays do not allow any editing or linkage to other elements.