Join #
The join form is the page presented to a user when the ‘Join’ link is selected on Montage.
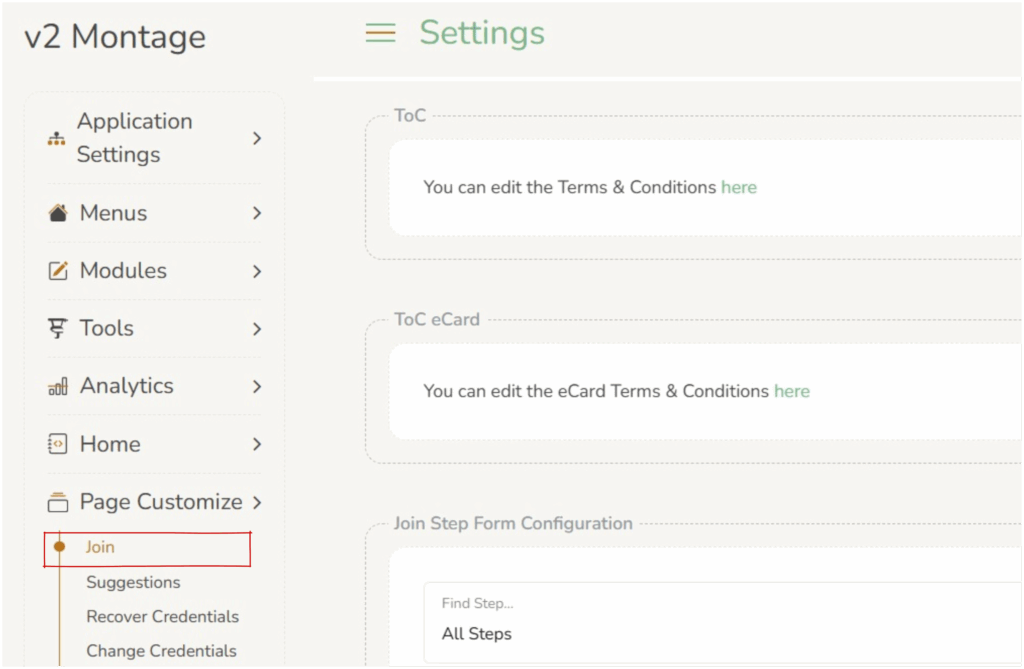
This can be edited in Page Customize > Join.
Terms & Conditions #
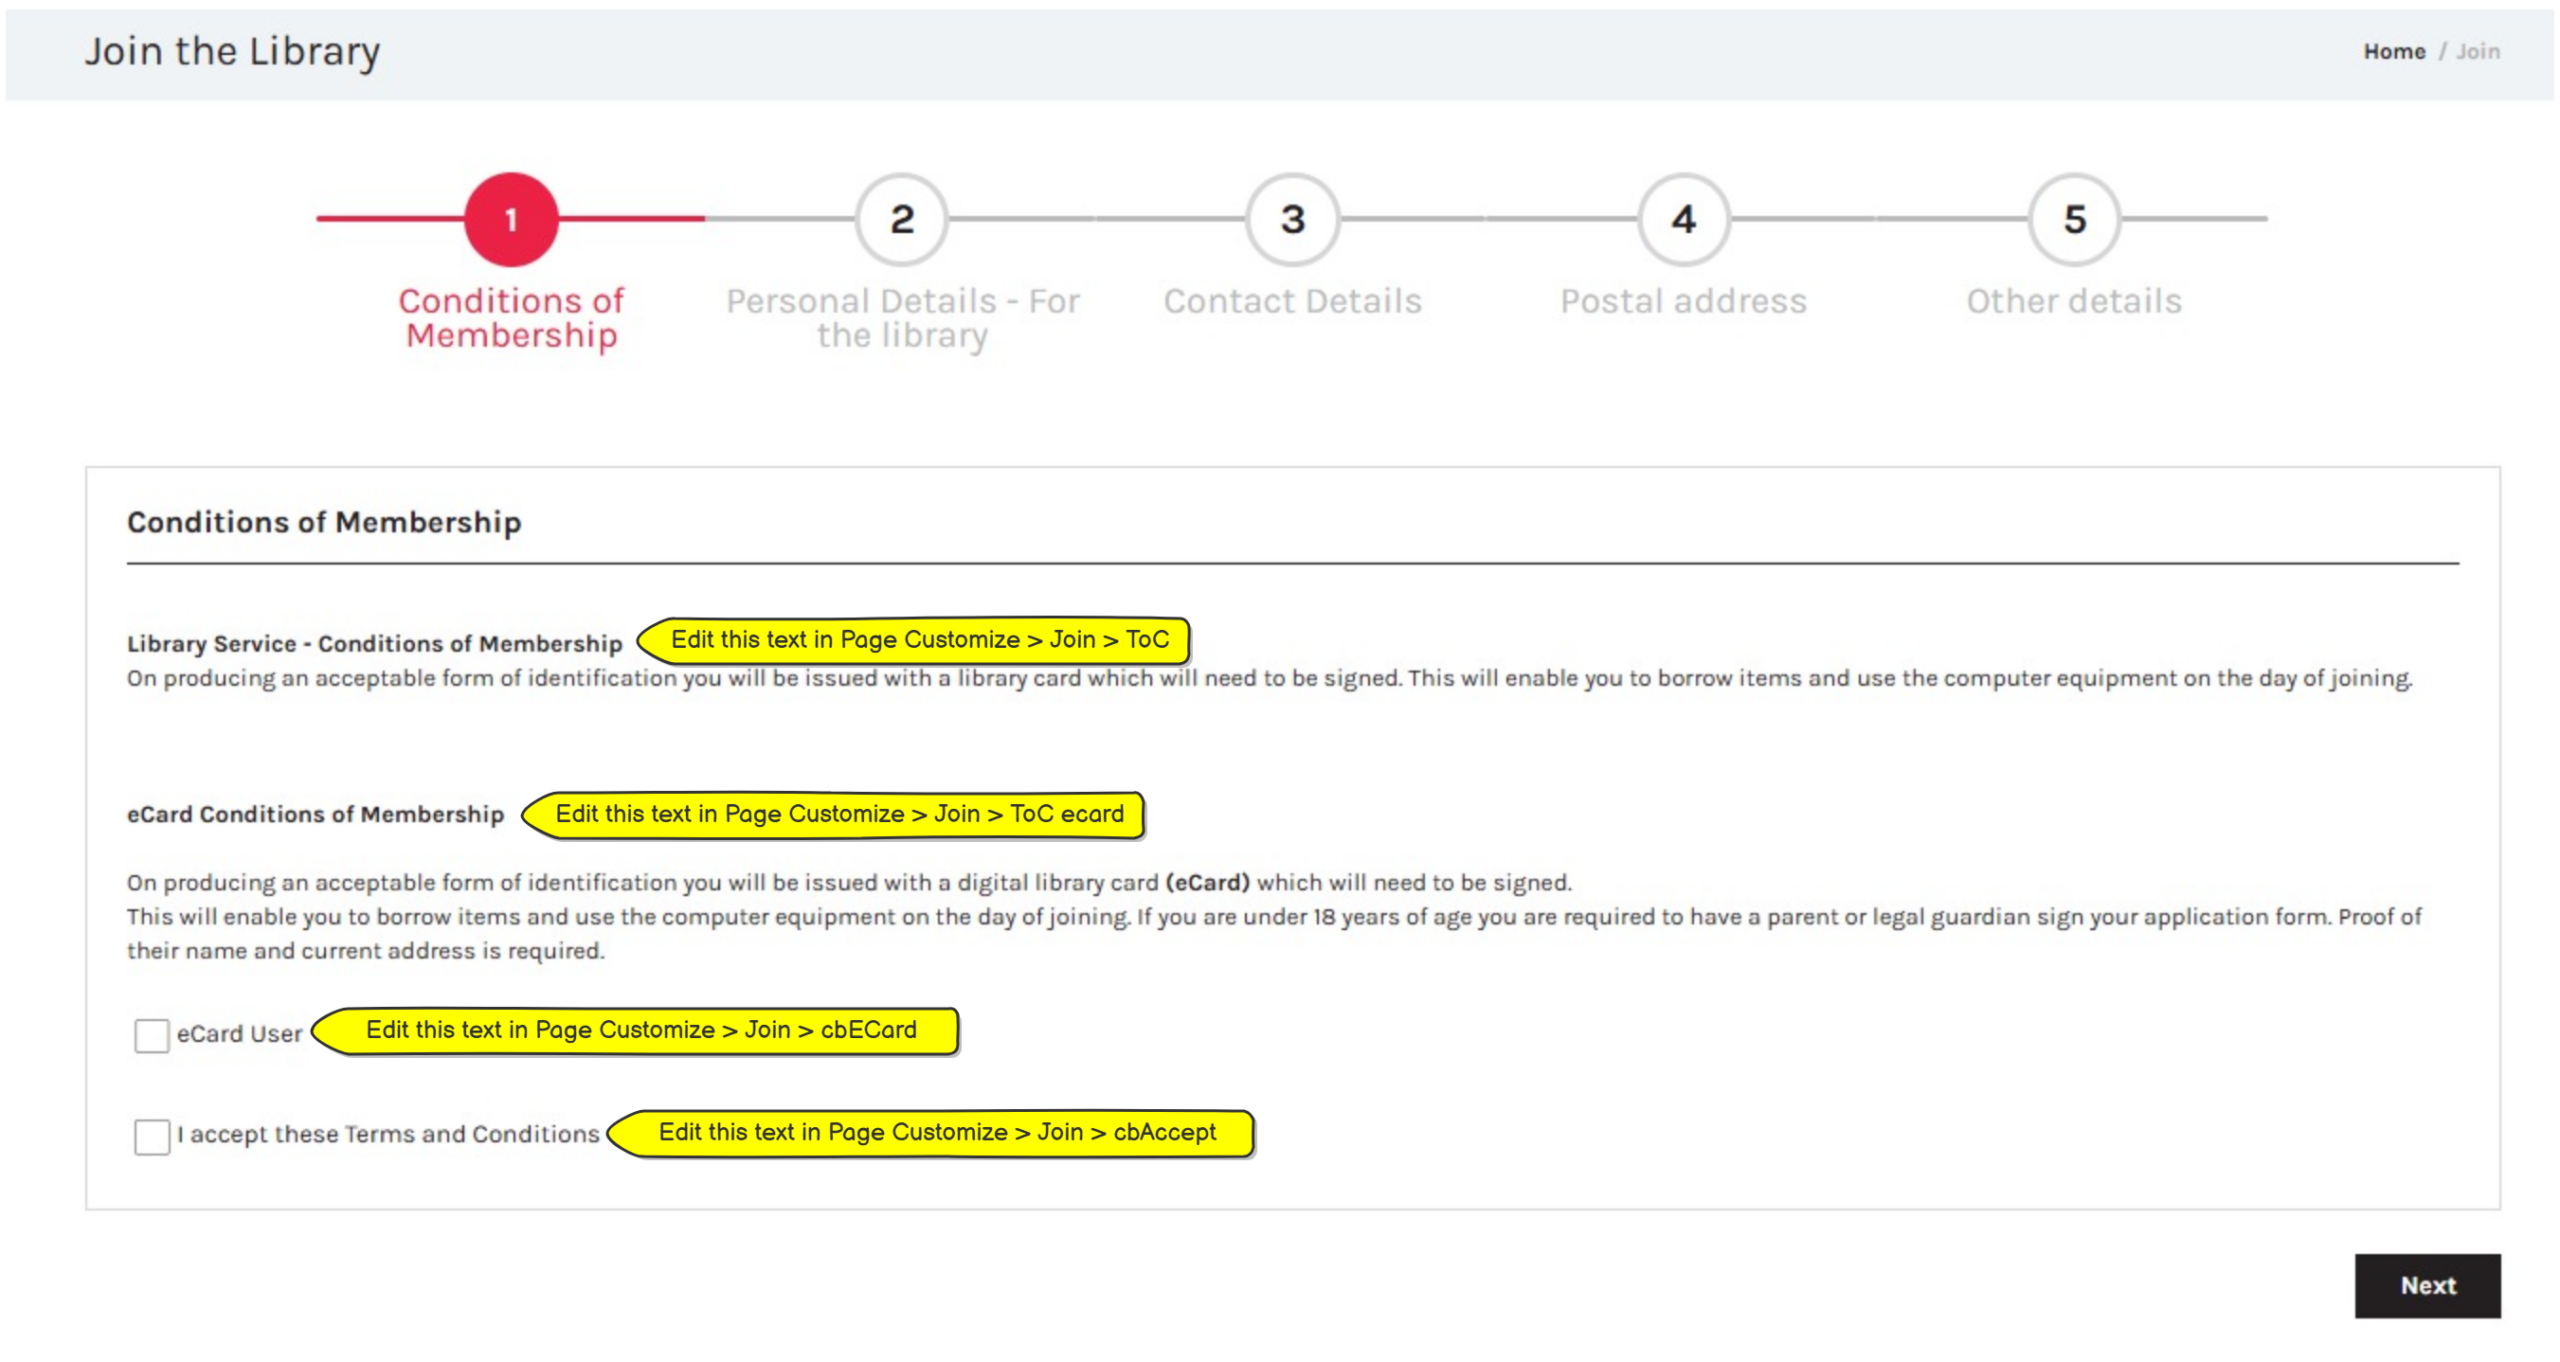
ToC : Operators can edit the Terms & Conditions as they appear on the Conditions of Membership page, via the link on Page Customize > Join > ToC.
ToC eCard : Operators can edit the eCard Terms & Conditions as they appear on the Conditions of Membership page, via the link on Page Customize > Join > ToC eCard.
Join Step Form Configuration #
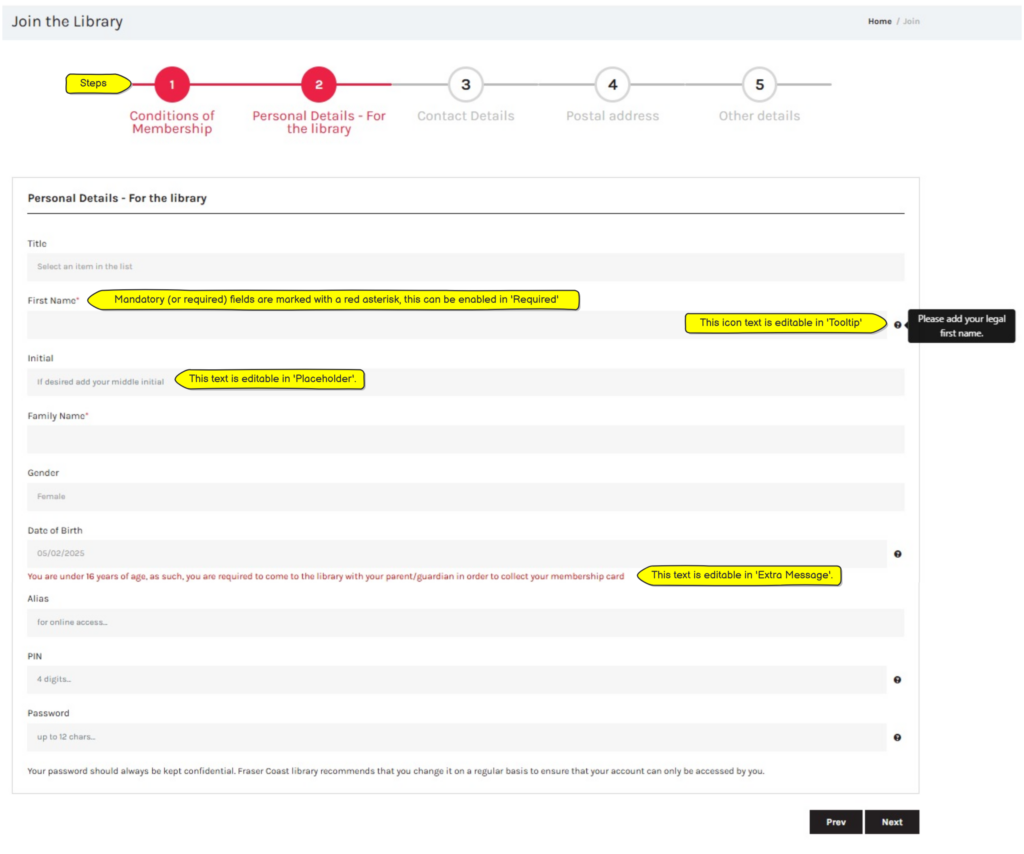
Steps are identified across the top of the screen on the Join page.
Important considerations for step form configurations #
- PIN and Password : Most libraries choose to use either PIN or Password for user access. Select ‘enabled’ for the chosen one. Note the setting in Application Settings > API Configuration (AWS) > iValidationMethod needs to be configured correctly.
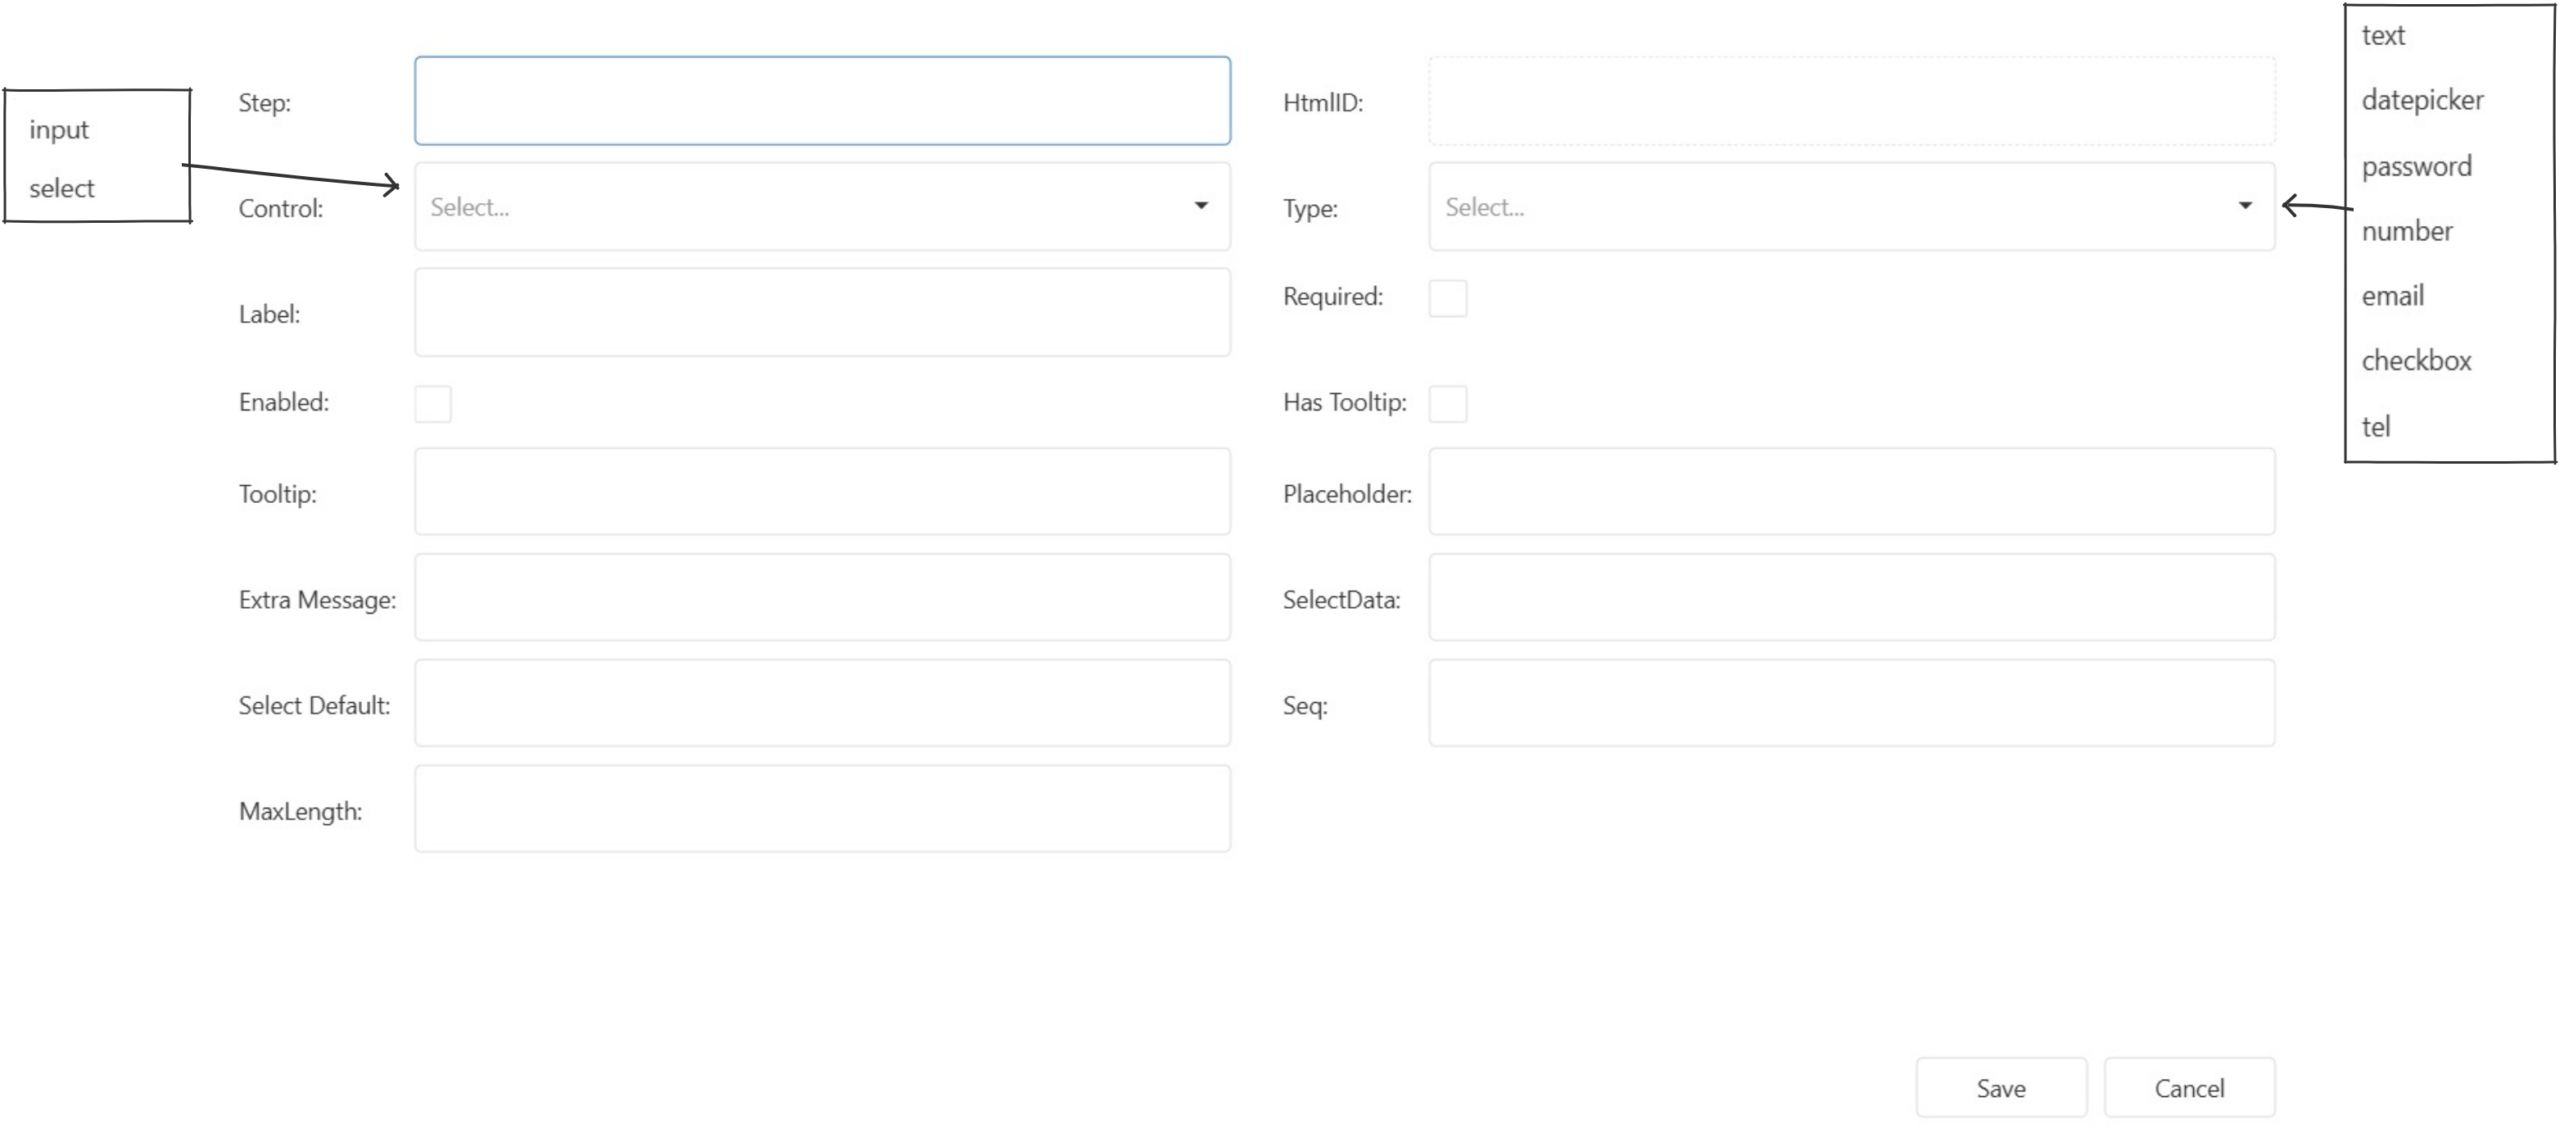
Each step is editable by selecting the ![]() edit icon.
edit icon.
- Step : Must be a number, determines where it appears in the join process.
- Control : Can be input or select (if select is set then you must choose a ‘Type’)
- Type : Relates to control > select (can be text, datepicker, password, number, email, checkbox, tel)
- Label : The name/title to display
- Required : checkbox to make this field madatory
- Enabled : checkbox can be selected on/off for display
- Has Tooltip : Displays an icon

- Tooltip : This is the text for the tooltip display
- Placeholder : Text displayed in the text box to guide the user (eg mm/dd/yyyy in DOB)
- Extra Message : Adds extra information below the text box. This can be used to advise junior users that they require parental assistance with their membership.
- SelectData : Provides the options for the drop down menu if control- select is chosen
- Select Default : Select the default you want to appear in the drop down list
- Seq : Determines the order to display within this step
- MaxLength : Allows for limits to be set for text fields
Step Captions #

Step captions are the labels attached to each step in the joining process.
These captions will also appear at the top of the page for each step.
These can each be edited in Page Customize > Join > Step Captions.
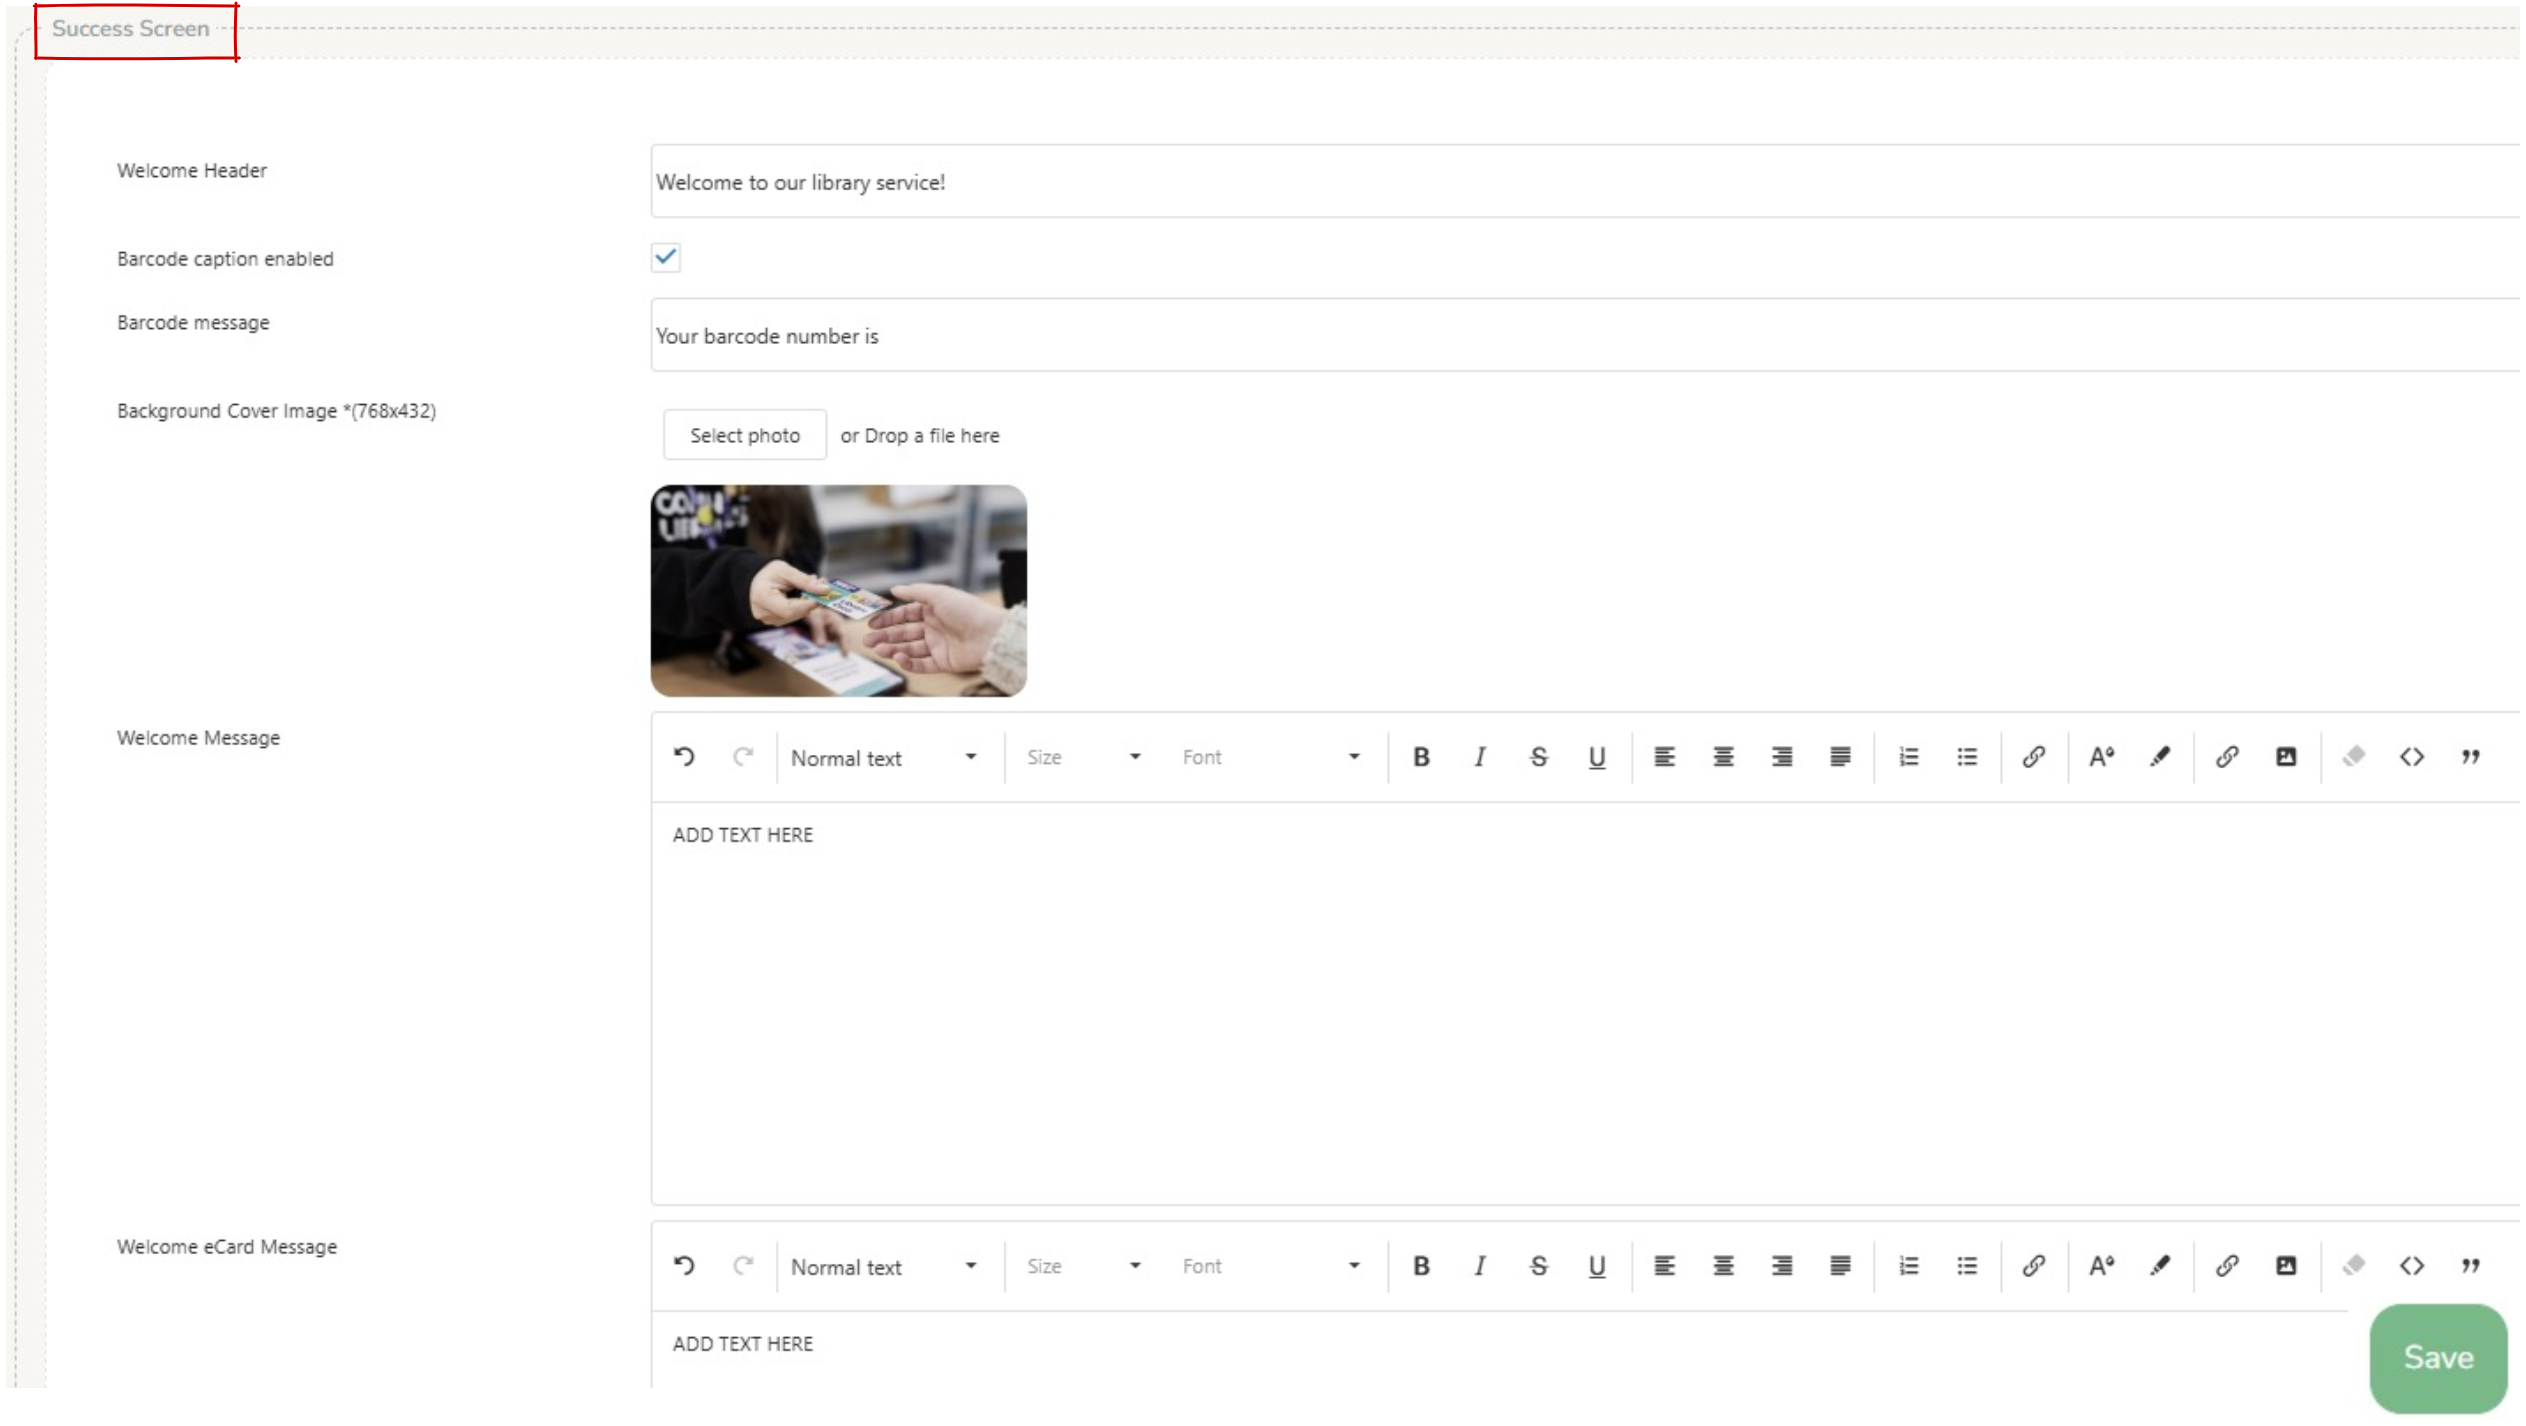
Success Screen #
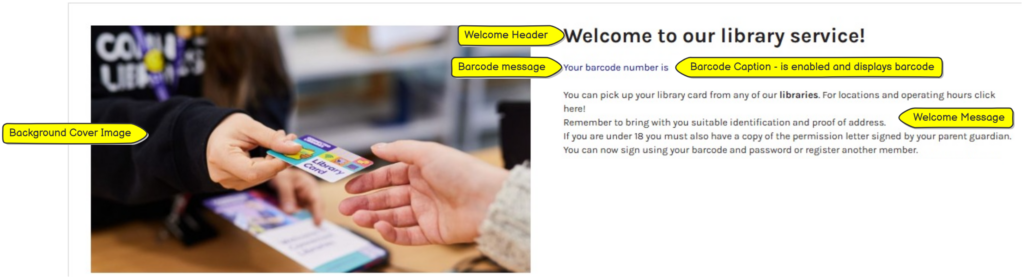
The success screen can be edited in Page Customize > Join > Success Screen.
Operators can edit:
- Welcome Header : displays as a title on the success message.
- Barcode caption enabled : if this is not checked, the barcode will not be displayed on the success screen.
- Barcode message : displays if barcode caption is enabled to announce the barcode.
- Barcode cover image : must be less than 768×432 pixels.
- Welcome message : displays a message from the library for a standard user, can include hyperlinks etc.
- Welcome eCard message : displays a message from the library for an eCard user, can include hyperlinks etc.
Turning off eCard functionality #
To turn off eCard functionality there are 2 settings which must be changed :
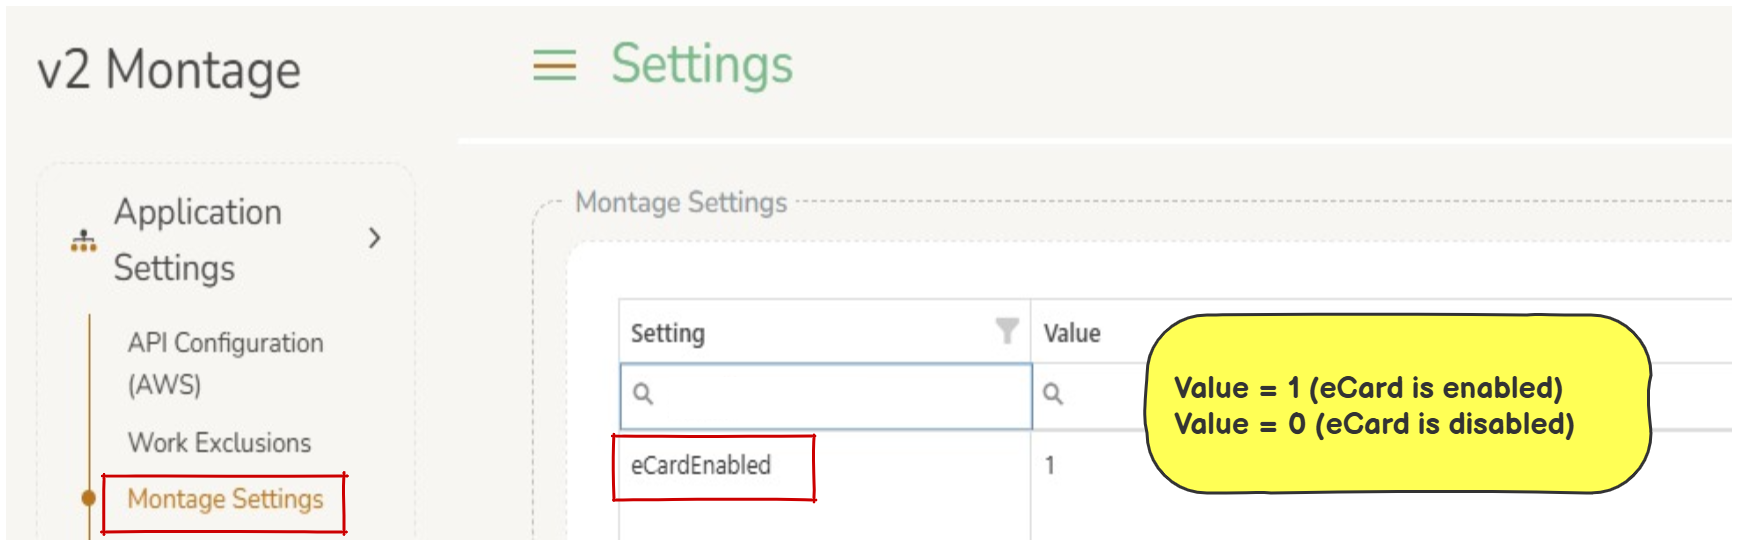
Application Settings > Montage Settings : ‘eCardEnabled’ is disabled if Value is set to 0, enabled if Value is set to 1. If this is enabled the Terms and Conditions for eCard will display on the join form.
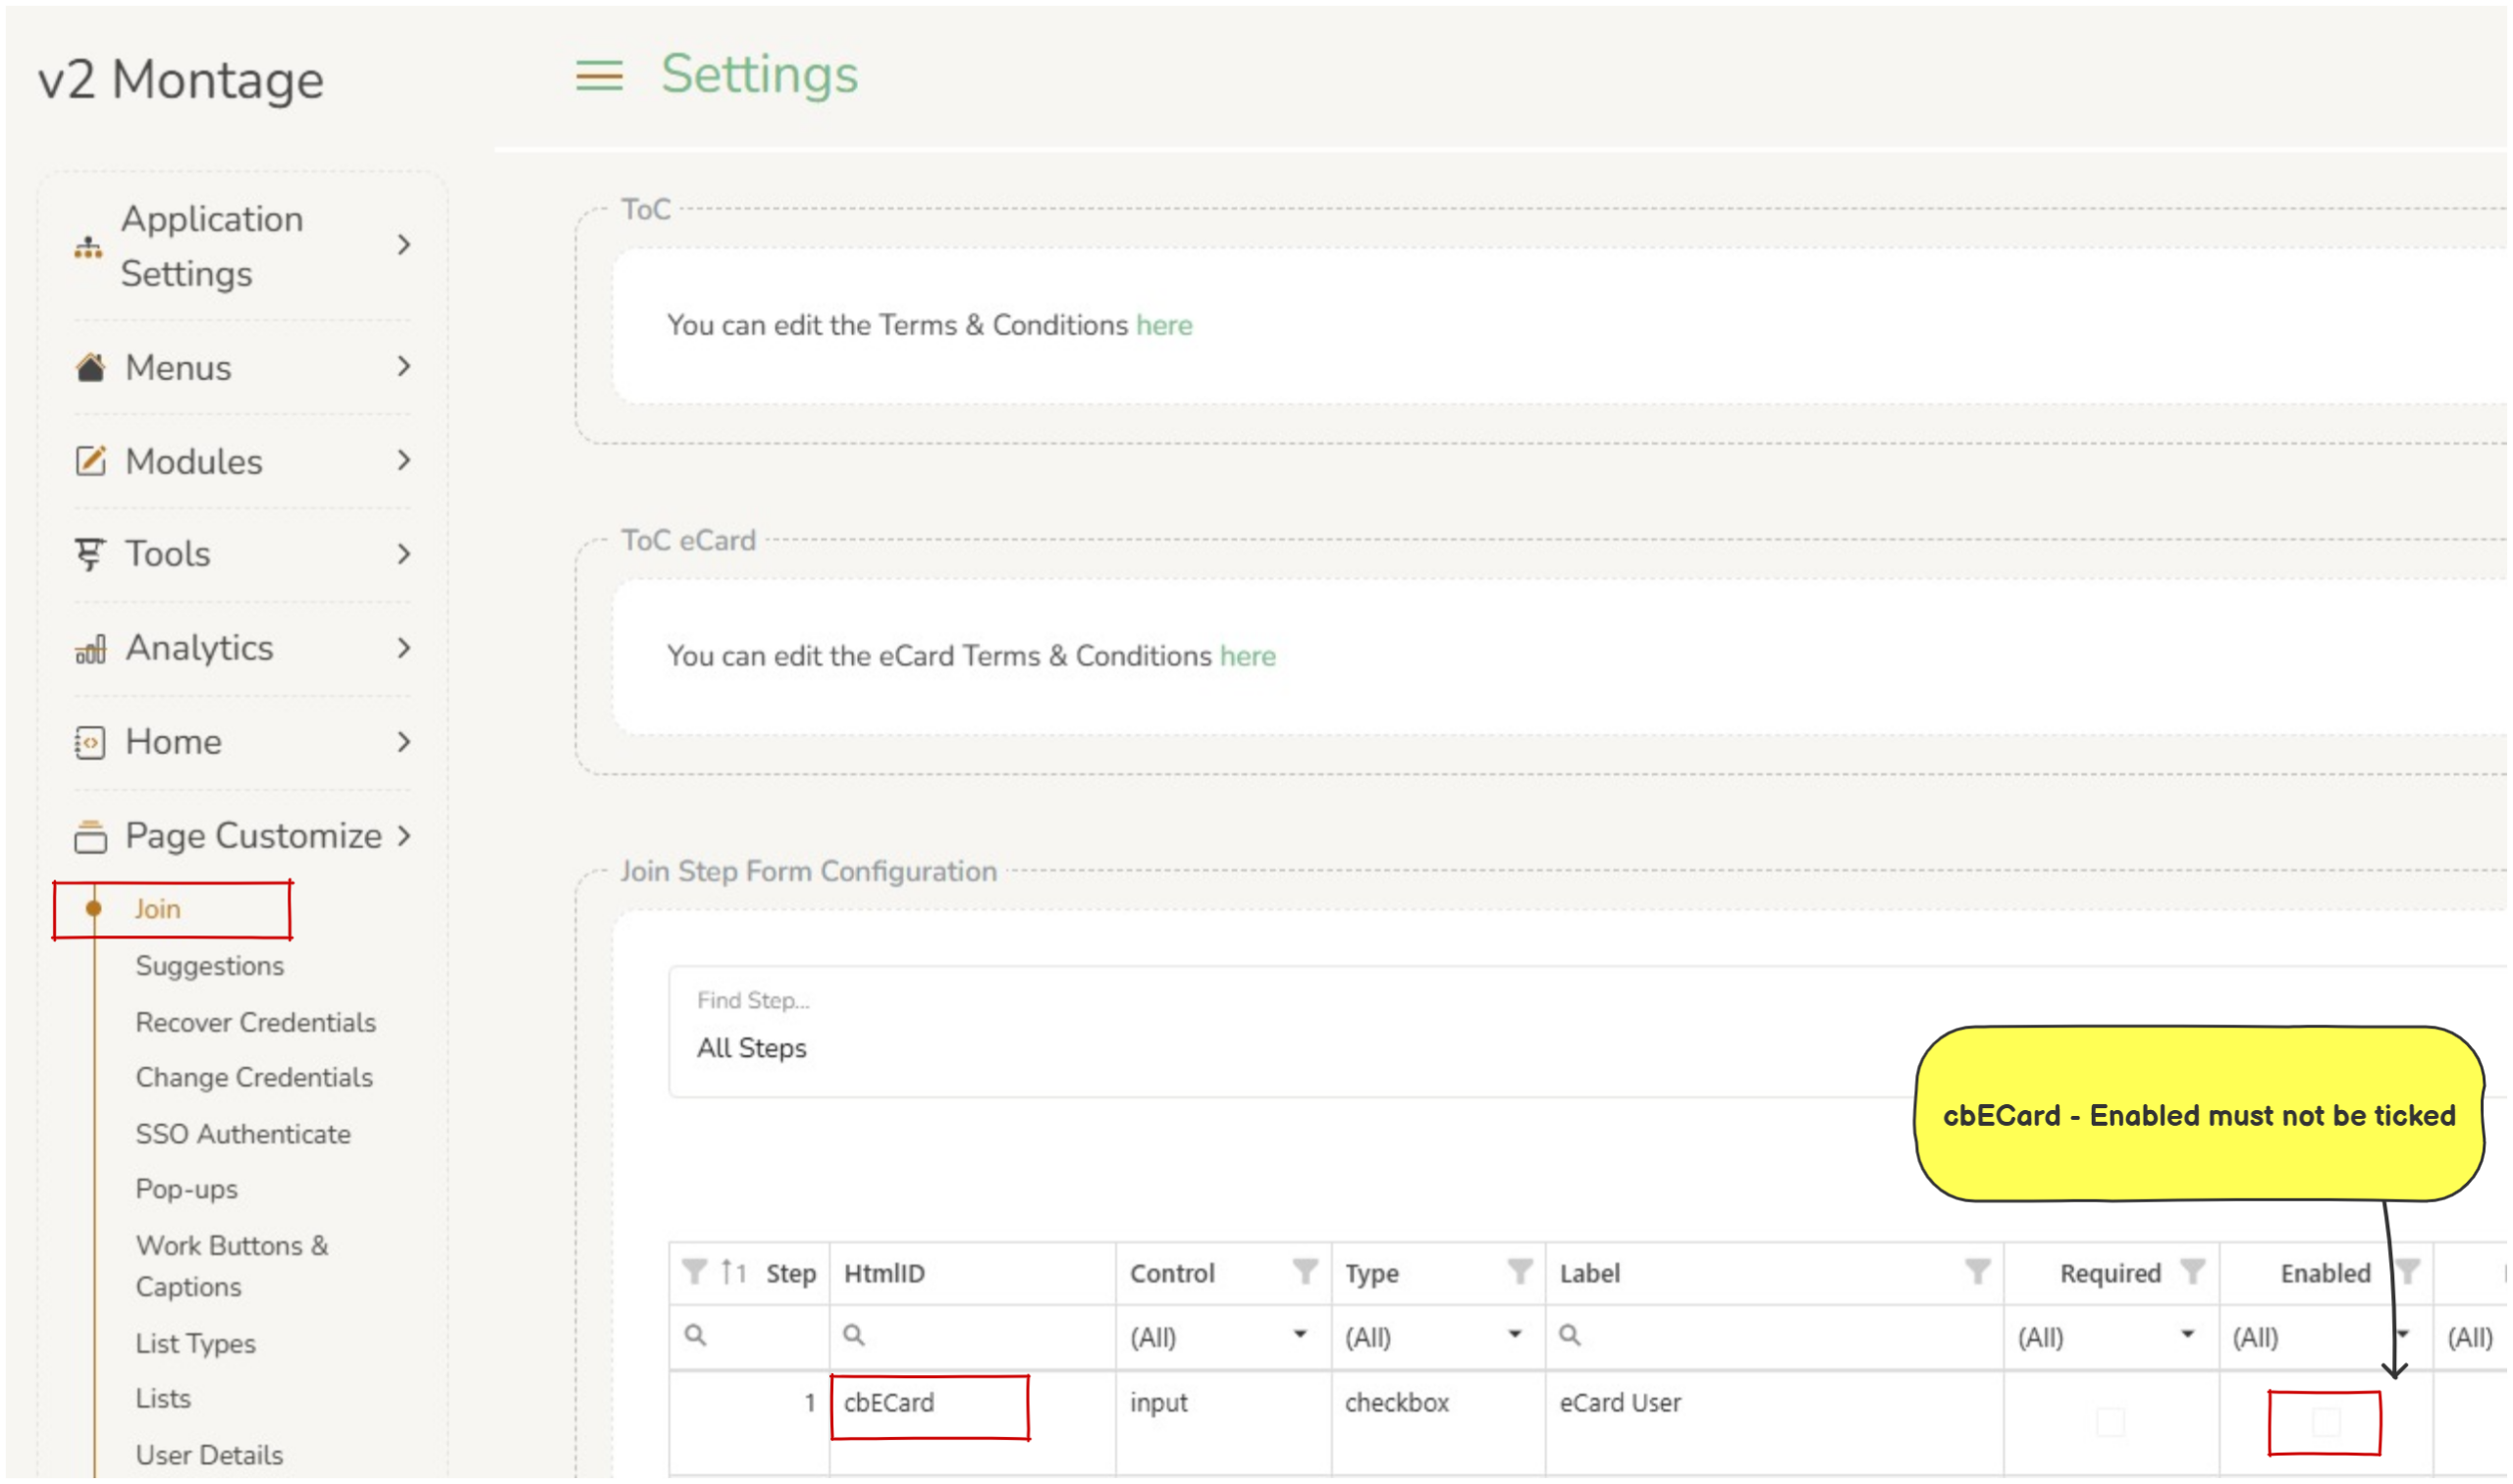
Page Customize > Join : ‘cbECard’ if the ‘enabled’ checkbox is ticked, the eCard check box appears on the join form.